
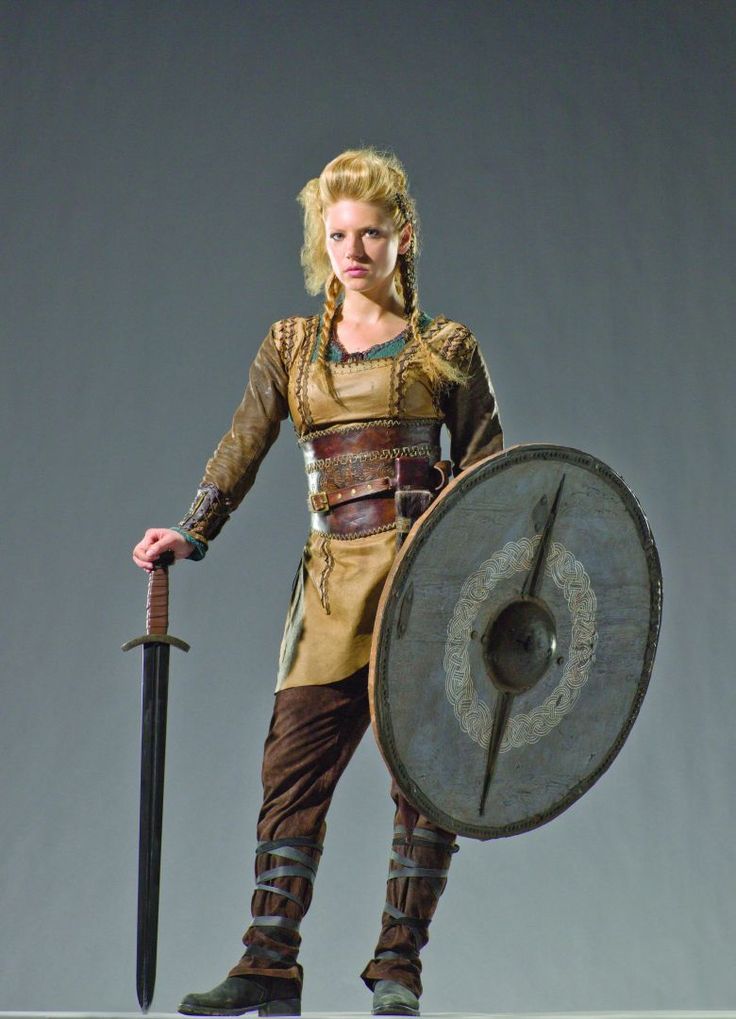
I got into watching Vikings a while back, and I enjoyed the show a lot! Especially the character of Lagertha caught my attention – I like how bad-ass she is. Mother, earl, wife and shield maiden all in one. She just kicks ass and she looks awesome while doing it! And also, she’s Scandinavian like me, so I sort of feel a sort of bond with her – my ancestors were vikings (well, some might have been, anyways).
I decided to recreate her leather armor/outfit from season 1 in real leather. I chose leather for a couple of reasons; First of all, my other cosplays have been cosplays of fantasy characters, and so the material choice seemed less important – I’ve mostly used pleather in the past, because I needed unnatural colours like green and red, anyways. Lagertha, however, is based on a real person, an actual shield maiden (however much she was fictionalized for the tv show), and so I felt like using some more historically accurate materials. Now, I know the outfit is by no means historically accurate, but even so, leather felt like a good choice. Another reason is that I really wanted to try working with leather. It’s both very different and very similar to fabric, and a very nice material to work with. It also smells really good! 😀 I also hope that leather in the long run will be more comfortable. It is warm, but in a different way than pleather, and I hope that temperature-wise, it’ll be more comfortable.
I started out with working on her tunic. I made a very simple pattern that is mostly just two squares cut out for neckline and armholes. I used some scrap fabric to test out the pattern before transferring it to the actual leather.

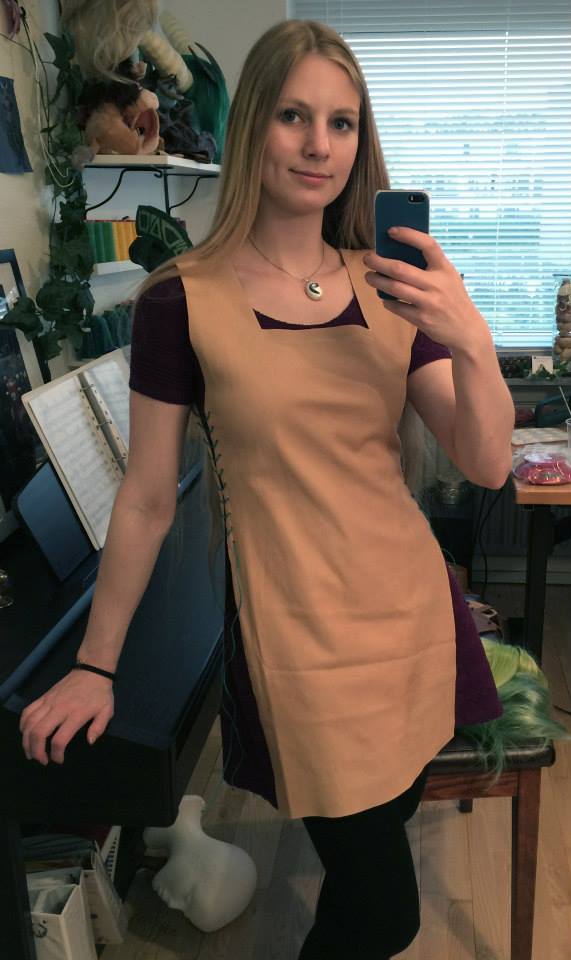
Left: mock-up from scrap-fabric. Right: Base of tunic in leather.
The next step on the tunic was recreating all of the ribbon and rivet details from the reference. The leather ribbons/trims (whatever you want to call them) are all made up of a wavy pattern. I made a template from cardboard and cut all of the pieces out by hand. I forgot how many meters of this I did, but it was quite a lot, seeing as there are more than one layer in many places. Some of the ribbons were dyed brown with leather dye. I punched holes and added rivets to them as well – there are around 300 rivets on the tunic in total, probably a little bit more.
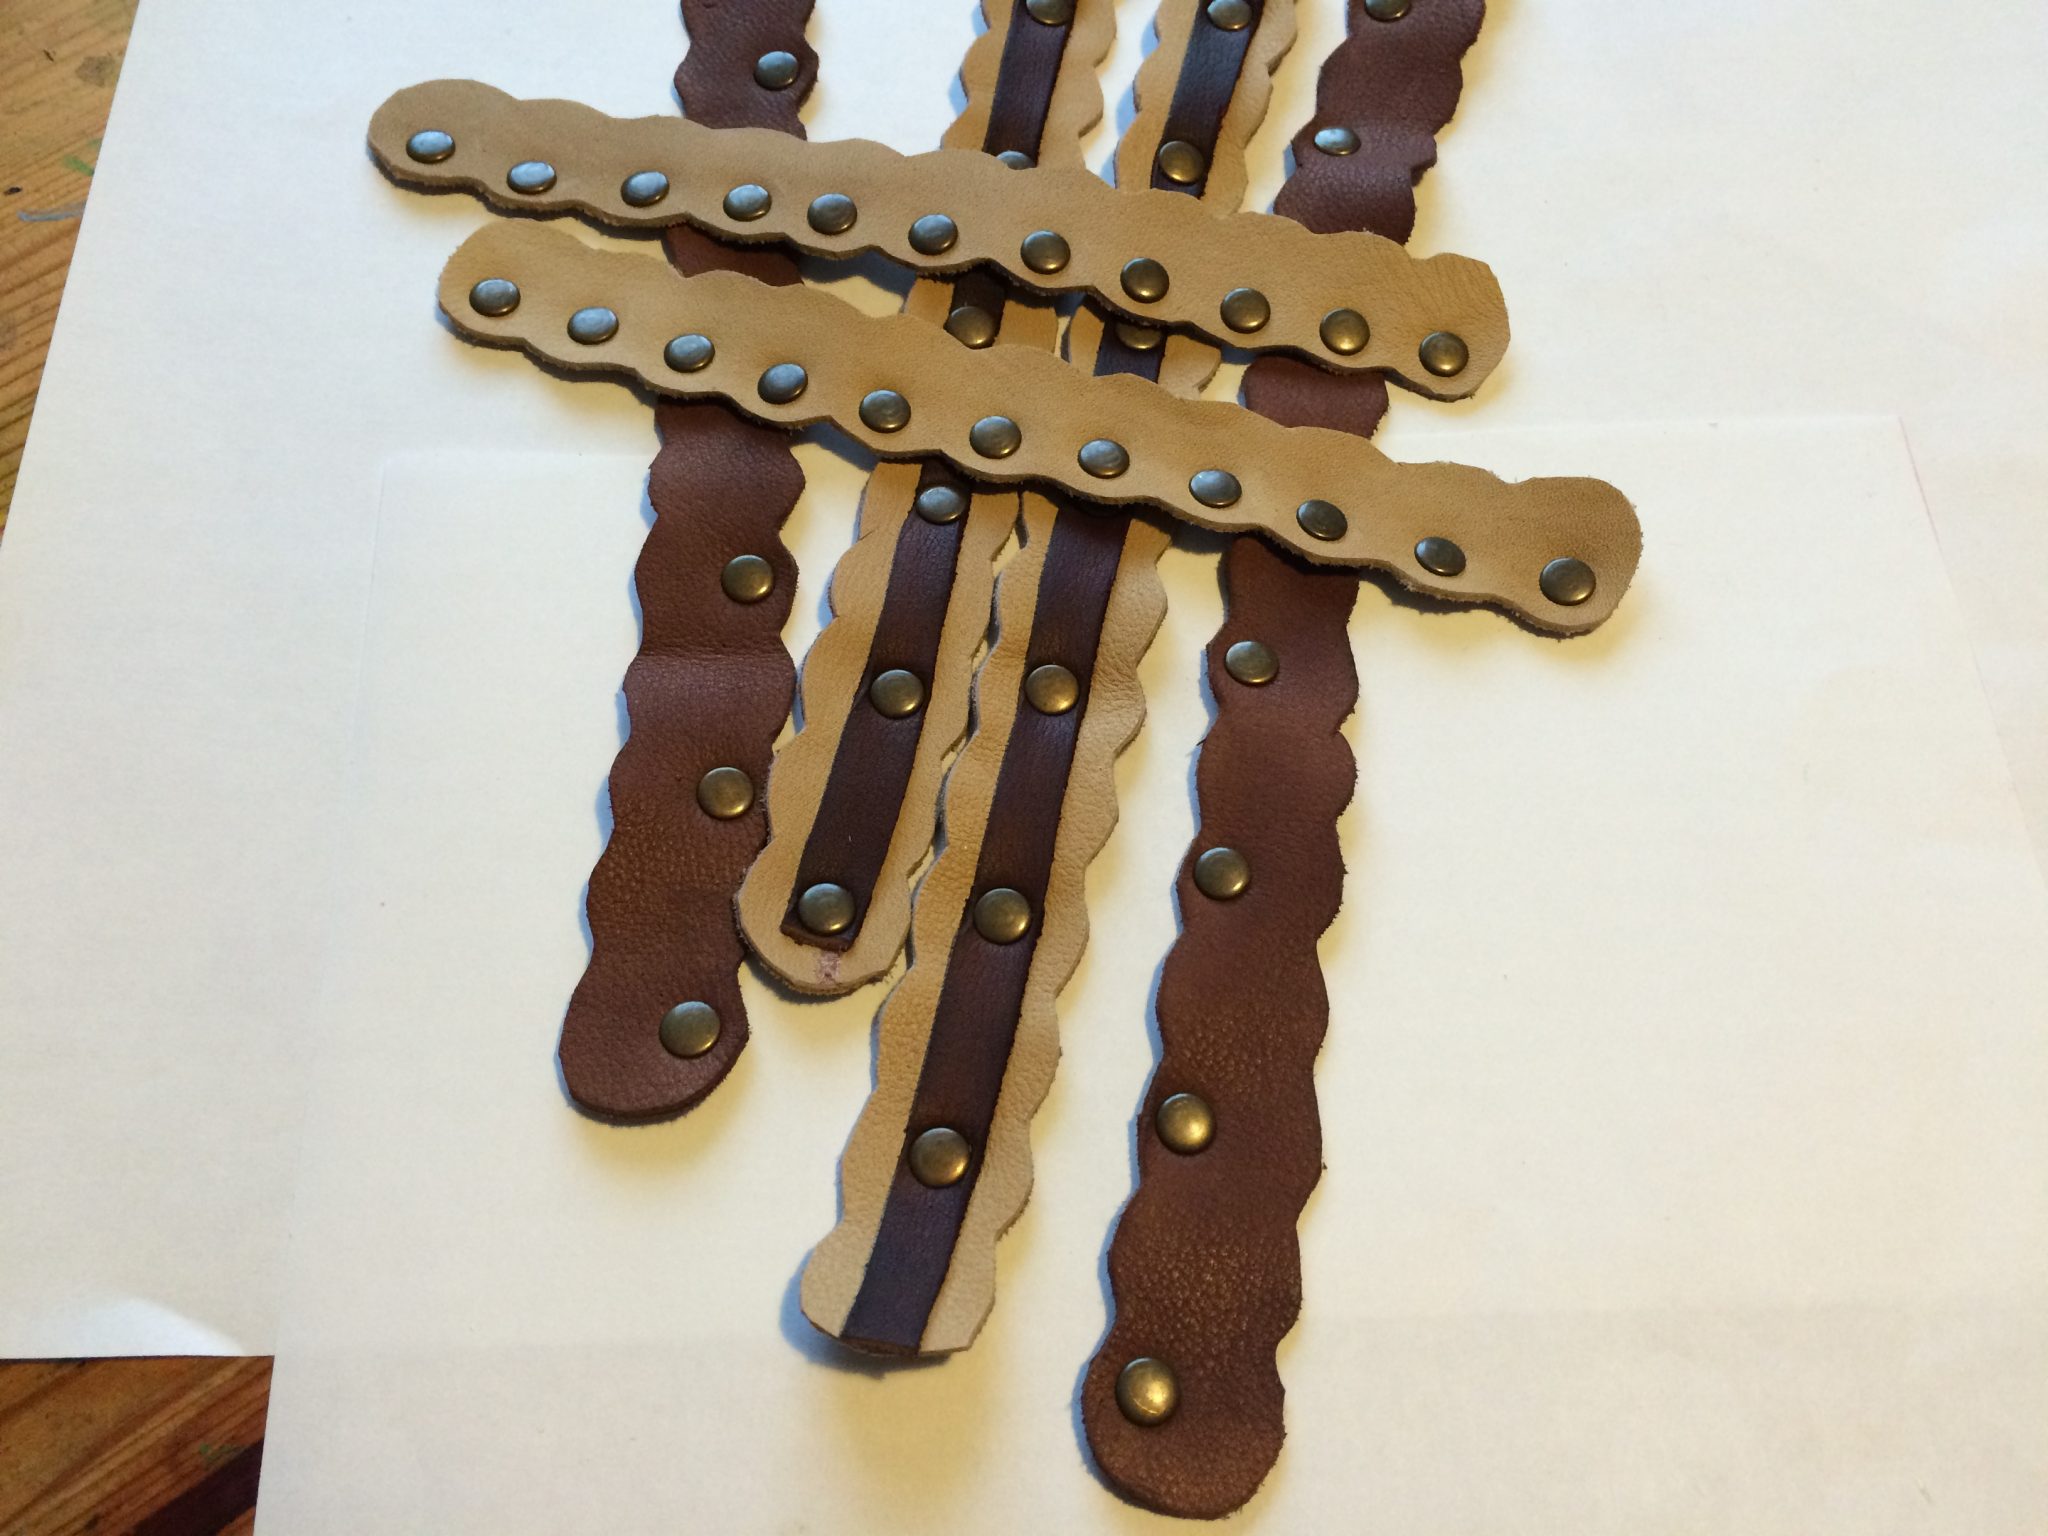
Some of the ribbons/trims added to the tunic. All pieces were originally the same sandy light colour, but using leather dye, it was dyed brown. The wavy pieces got 1 layer of dye, while the dark strips got two layers to become darker.
Once the trim was done, I glued it onto the tunic using contact cement. My rivets were not long enough to go through all layers of leather, and there was also too great a risk to make a mistake being the rookie that I am. I also added sleeves, which I made by adjusting a pattern from a t-shirt.
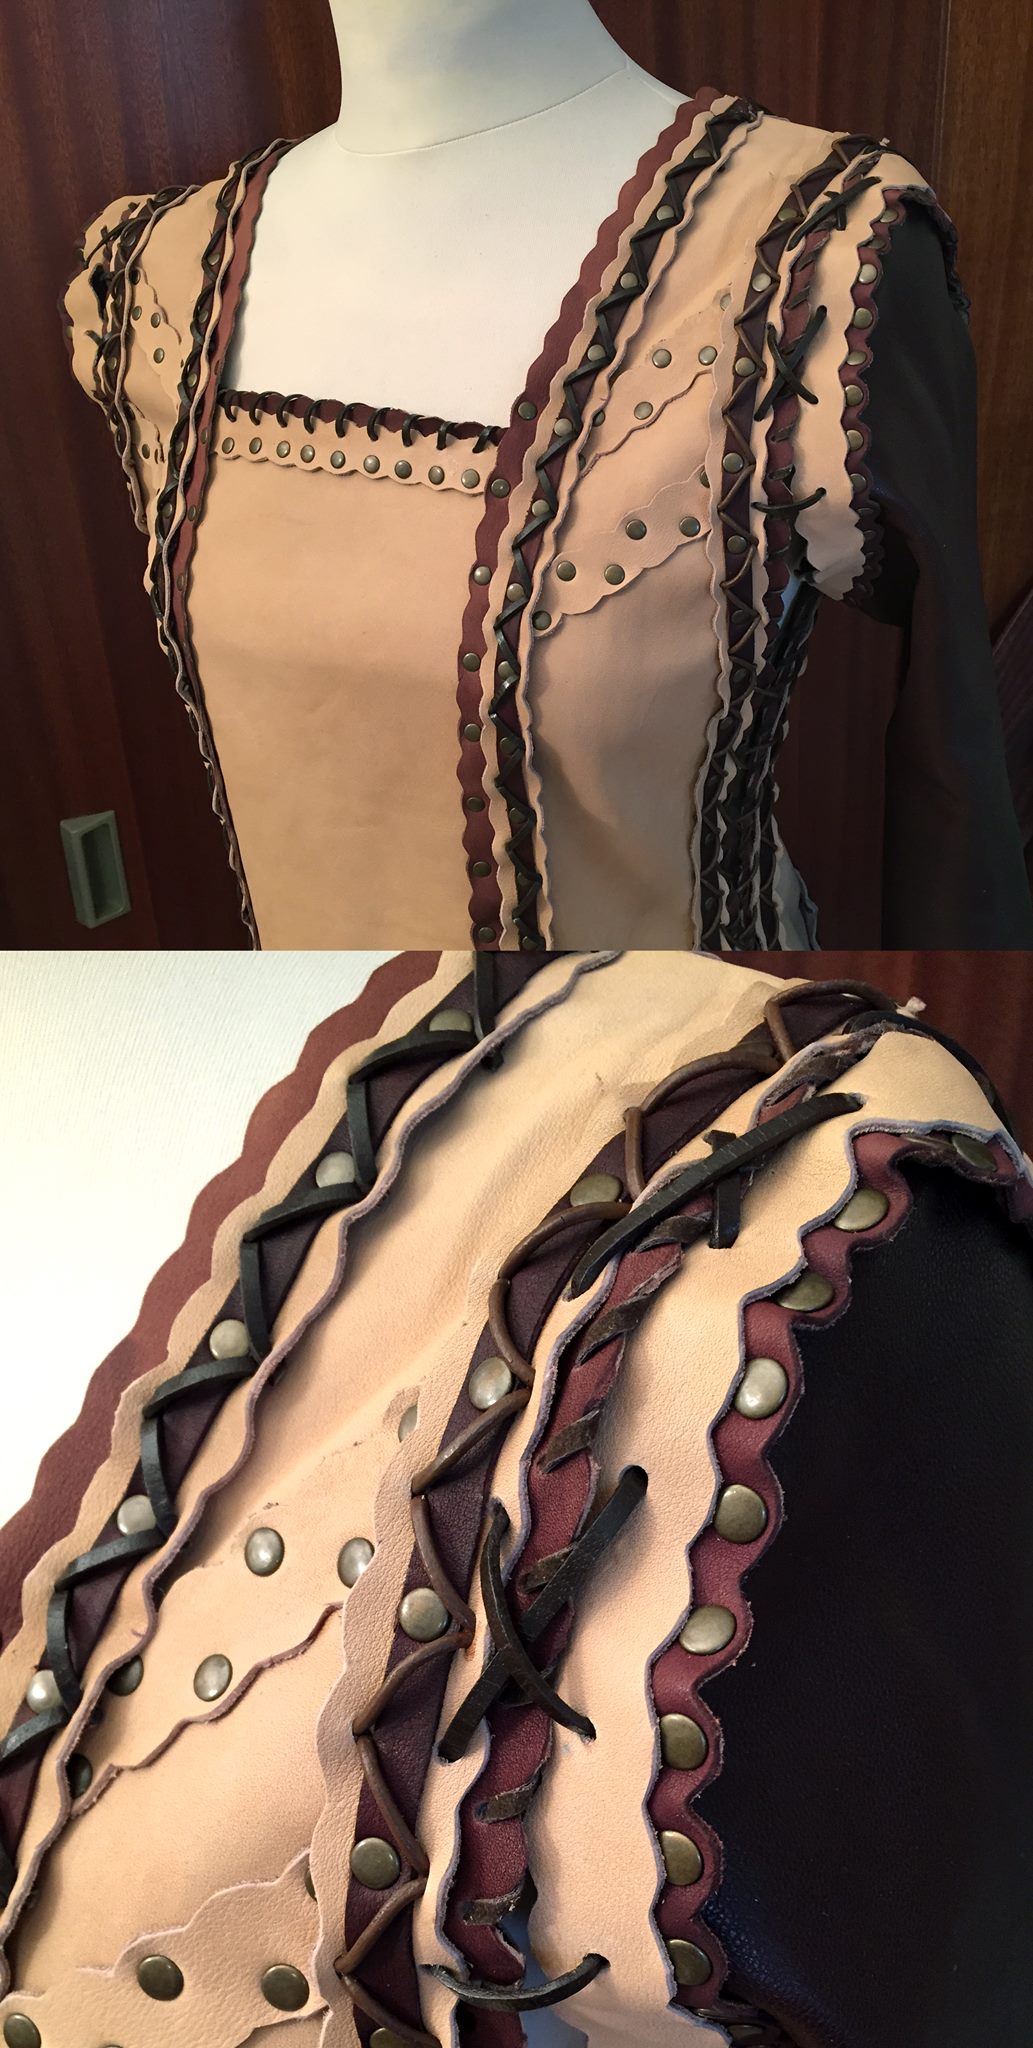

I added flat and round leather cord to the ribbons as well, to imitate the leather cords used in the reference. The sleeves are tied to the tunic using flat leather cord that is tied criss-cross with holes in the sleeves and in the arm holes.
The sweater was made fairly easy by tracing a stretchy t-shirt with a good fit onto some pattern paper and then using the pattern on my stretchy knit fabric.

All the edges were serged/overlocked to avoid fraying. Colors are a bit off in this photo.
The sweater in the reference is actually crocheted with a pattern and has a crocheted leather neckline as well, but my talents lie elsewhere, and after a long time searching, the fabric I ended up choosing came closest to the colour and texture I wanted. Although I cannot crochet, I am lucky to have a mother who can, so she did the crochet work on the neckline

Before the neckline was crocheted, I cut a slid down the front. It automatically became a triangle, and when the crocheting was done, I added some leather cord to each side to tie them together, like the reference.
The belt/waist cincher was one of my favourite challenges with this costume! I used tan core leather for it, which is nice and sturdy. I never did any kind of leather tooling or stitching before, so I did a lot of research before reaching this stage. I started off by measuring out how big I wanted the belt and making a pattern from paper.

I sketched the bird pattern I wanted to tool into the leather – I combined artwork found online with screenshots from the show to recreate a pattern as close to reference as possible.
Next, I cut out the 5 pieces that made up the main belt.
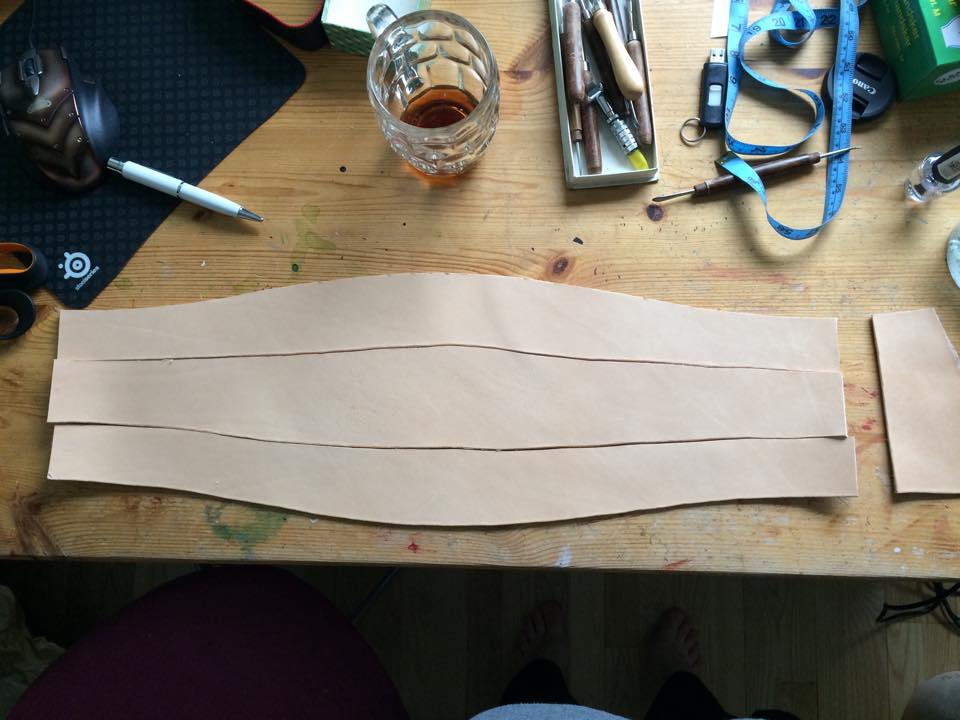
The belt consists of 5 pieces: 3 that go almost all the way around and 2 smaller pieces that hold the laces at each end.
The fun part was up next – the tooling of the middle piece of the belt! I used a sponge to wet the leather before starting on the pattern. I used a small, round-tipped tool to transfer the bird-pattern from the paper to the leather. I then used a swivel knife to cut out the borders, then used some leather stamps to both make the border appear more 3D and to create the pattern of the “background” area around the birds.


Some photos of the tooling in progress. My stamps and swivel knife can be seen in these photos. I used a regular hammer to hammer the pattern, but a rubber one would probably have been nicer.
After I finished the tooling, I dyed the leather with leather dye. I first added a very deluded paint to get the very light brown colour for the bird pattern, then used the undeluded paint and applied it with a paint brush around the pattern.

The dye used is a Danish brand called “R.O.C. Narvsværte”
Next up I added stitches. I used waxed linen string to sew it together and pre-punched holes in the leather. The string I used was in a colour called: “natural”, but it was a bit too bright for my liking, so I stained it with some higly deluded leather dye to get a more “dirty” colour. I couldn’t find small brass rings in the right colour, so instead I painted some silver rings. These are placed along the upper edge of the belt, embedded in the stitches.
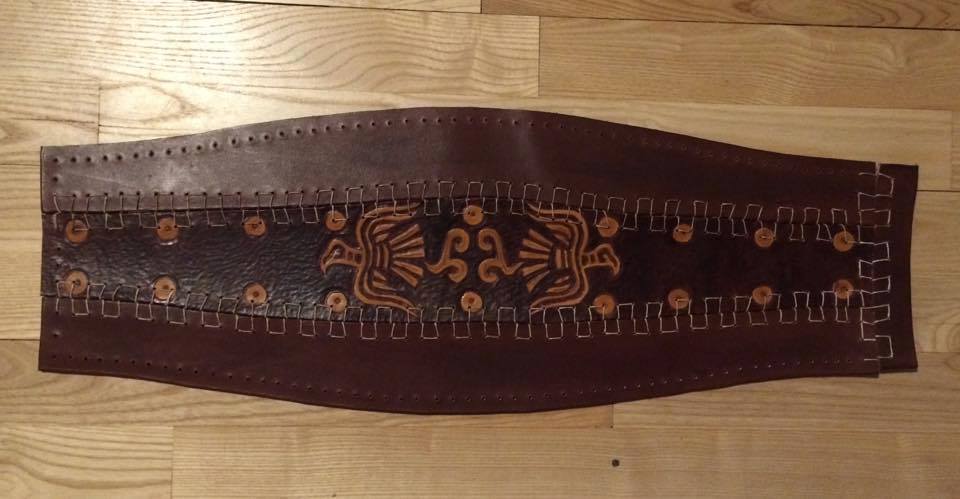

The stitches were improvised and I did not follow any guides – I did a few tried before finding a method that gave the right stitches. At the top and bottom, I first stitched from left to right, then from right to left to get the triangular stitches. The belt closes with leather cord at the back.
The next part was the pants. This part was fairly easy – I found a pattern for a fitted pair of pants and instead of adding a zipper at the front, I stitched the pants together and added instead laces at the sides. Other than that, I followed the pattern, which was from Burda (forgot the exact number, but any fitted pair of pants pattern should work)
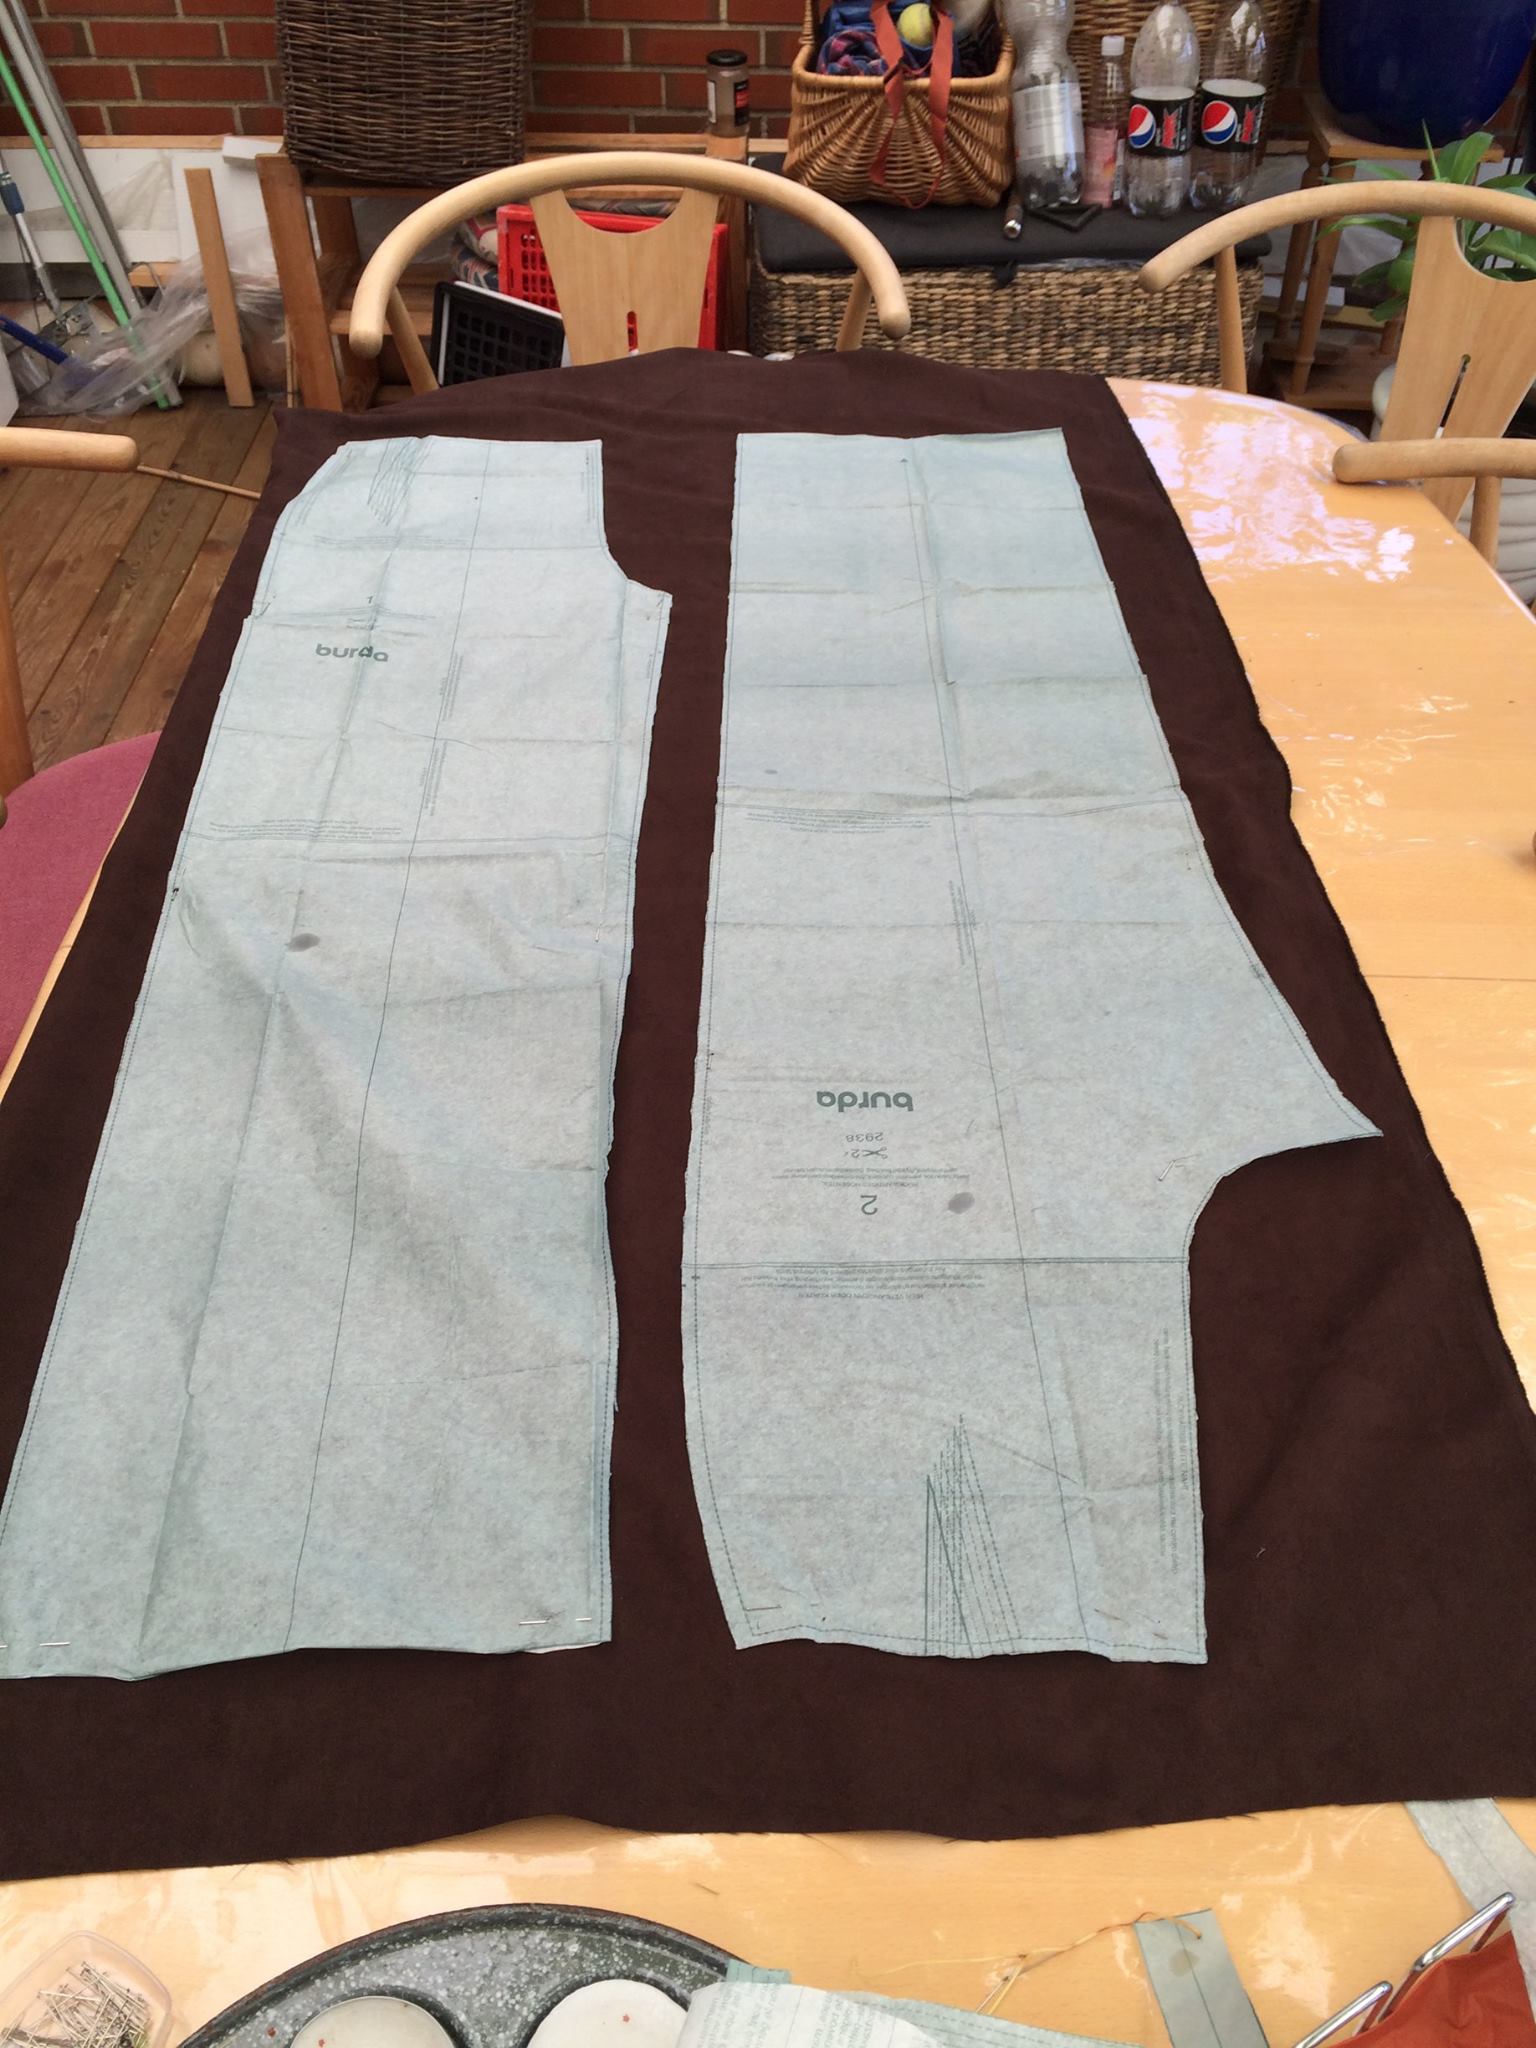

From pattern to finish, the pants only took few hours to make. I later added black leather straps that have a few stitches behind my calves to keep them up while they are tied around my legs.
The bracers were made of two materials – core leather and brass. I forgot to take pictures of the leather part before attaching the brass, but it was made very simple – just a square with holes along the edges. Some flat cord was used at the top and bottom for decoration and round cord at the end for the closing. The fancy part of the bracers is the metal part. I tried two different materials – brass and copper – and ended up deciding that brass looked more like the reference. To get the pattern on the surface, I used two hammers, one with a flat end in one end. I placed the mtal squares on a flat surface which was covered in rubber from a tractor tire, then hammered the pattern using one hammer edge as the stencil and hammering with the 2nd hammer.

Left metal parts are brass, right are copper. In this photo, I used vinegar in an attempt to oxidize both to look older.
I decided on using the brass, as it looked more on point with the reference. It needed to have a more old look, so I used ammonia fumes to oxidize it and give it that brown look. If you want to do the same, please be careful as the fumes are so strong, they make you cry, and they are very unhealthy. Do it in a well-ventilated place – if possible, outside – and wear breath protection and spend as little time as possible in the fumes. I placed the metal on top of bowls that contained the ammonia, they didn’t touch the liquid.

Brass after it was stained with the ammonia. I rubbed the raised points with a cloth with vinegar before mounting them on the leather to make those parts shine a bit.
At last, I drilled holes in the metal and punched holes in the leather and attached them with rivets

This type of rivet consists of two parts that screw into each other instead of being hammered – great for this purpose and also good for leather belts!
I had a little help from my dad with the shield – mostly in terms of power tools, because some of them scare me! We found a piece of MDF wood and measured out the size. Then cut it with an electric saw.

The base of the shield
First thing I did was painting it brown on the back with an airbrush

I used airbrush, because I didn’t want brush strokes – I used first a lighter colour, then added some dark areas to give it the colours from the reference, in which the brown isn’t an even colour.
Next, I made the shield boss. I used worbla as the base, which I covered in acrylic filler and sanded until I wanted to puke. Then I spray painted it, first with a black primer, then with silver.
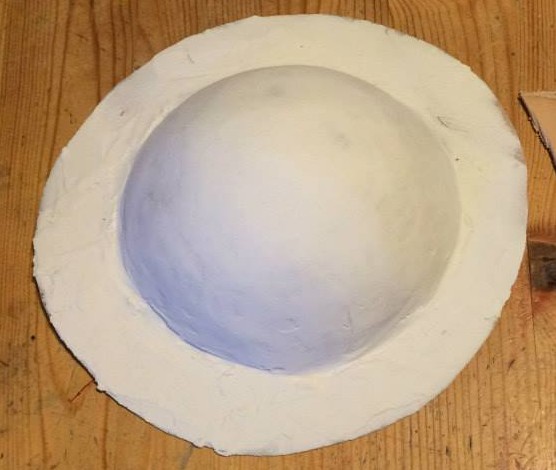

First picture: Shield boss with acrylic filler – half-way through sanding (and a test-piece of leather tooling work). 2nd photo: Shield boss ready for mounting.
I used a dremel to add some wood grain and texture to the MDF, which is pretty smooth. I also used a knife for some of the deeper, straighter scratches and lines. The shield has a raised edge around it, which has a LOT of small “nails” hammered into it. I made these using polymer clay.


The polymer clay in the making. I used no mould, just my own eyes to estimate the size – I figured vikings probably would’ve done that, but who knows?
I used craft foam for the flat parts and paper clay for the long parts that go from the middle and towards the edges.

All of the craft foam, polymer clay and worbla parts were glued on. The paper clay was sanded and all parts (except wood) covered with wood glue to give a smooth finish.
I painted a base layer of paint on the shield using acrylics and a brush.

The shield in base paint coat – already looking like a shield by now!
I mixed black paint with water and applied it to the shield with a sponge, then wiped it with a cloth to give it a sort of dirty, used look, and to help the carvings I made in the wood be more visible and thus making the whole thing look more like it was made of real wood and not MDF.

Using above tattoo design as reference, I hand-drew the design in the correct size on thin pattern paper (the transparent kind) with a pencil. Turning the paper around and tracing it on the back then transferred the pattern onto the paper (the pencil lead on the side of the paper touching the shield transferred to the shield when pressed hard onto the shield by drawing on top of it)
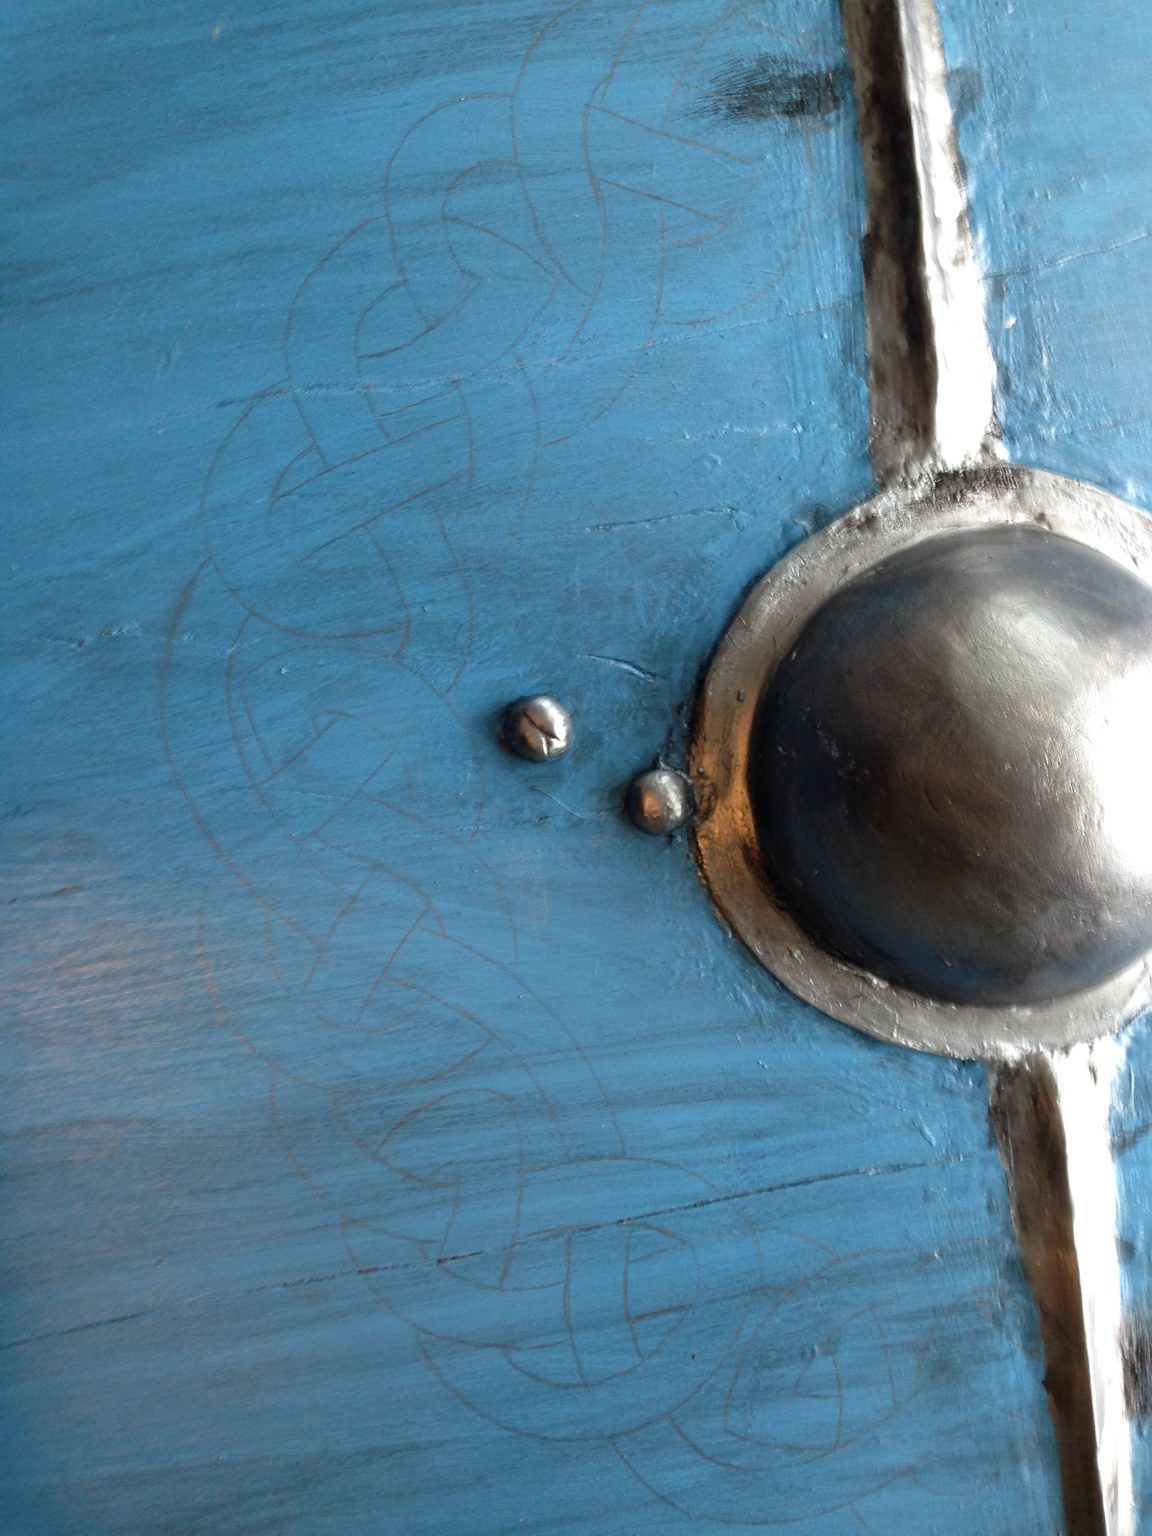
I transferred the pattern using thin paper and pencil.
Using a white marker, I traced the pencil drawing to make it stand out.

I used a white Posca marker to mark up the pattern. I later added more lines inside the first ones.
The shield now only needed handles, and there are two on it – one is a wooden bar that is used when holding the shield in your hands – for this, I used a round rod and just cut the ends flat with a saw. I painted it first, then first glued then screwed it in place to make sure it would stay – the shield is quite heavy.
The second handle is for slinging the shield over the back so you would be able to have your hands free. I made this with leather left-over from the belt and some O-rings. The leather straps were glued on, then a piece of leather glued on top to help keep in place and lastly, more screws to keep it all in place.

The leather straps are triple secured, because there is so much weight on them.
The last remaining part to make of the costume was the sword.
For this, I also had my dad help me some with power tools. We picked out a piece of wood on which I drew the shape. We cut it out with an electric saw, then “sharpened” the blade with an electric planer. Some sanding (again with a machine – they make life darn easy!) and the base was done.

The wooden base of the sword.
The ridge that go along the centre of the sword was made with a dremel

A dremel with the round sanding tip was used for the ridge in the middle of the sword.
The handle was made with 3 layers of EVA foam, which was glued on with contact glue, then sanded. The hilt was decorated with Worbla’s Deco Art, which is a nice and smooth finish.

I got a mini-Lagertha, so she posed for this photo! I covered the EVA foam with wood glue to smooth it out.
Before painting it, I added 6-7 layers of gesso, which I sanded with a sanding machine.

The sanding machine actually broke halfway through, so parts of it was sanded by hand… Auch.
Below, a collection of photos from painting process.

1. Broken sander… Meh. 2. Sword done and ready for paint. 3. Spray painted silver 4. Rubbed with a dark silver (black+silver acrylics mixed) with a smooth cloth in many thing layers to give it that dark, dirty metal colour.
The very last thing remaining was the scabbard (which I worked on alongside the sword, so some photos have the unfinished sword in them).
I started off by laying the sword on a piece of cardboard and tracing the edge. Then I added some seam allowance to the cardboard and cut out my pattern. I stuck it together with painters tape to test the size. When satisfied, I cut it out from core leather.
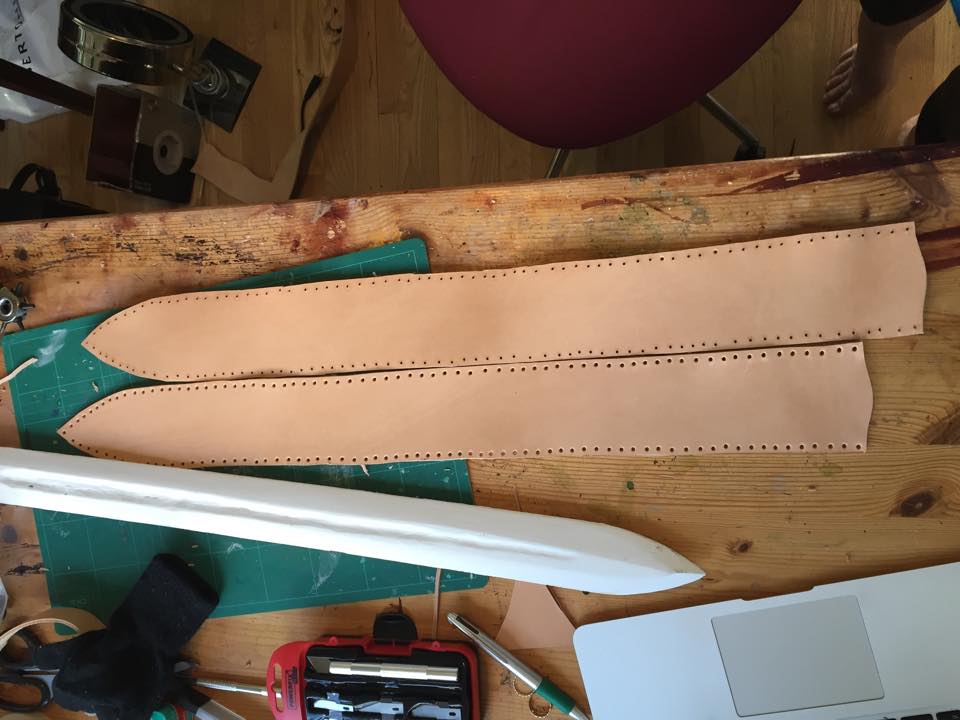
I punched holes in it next. Looking back, I probably should have wet shaped it BEFORE stitching it together – but it all worked out just fine, luckily!
I stitched it together with simple stitches. I don’t know how they’re called, and this was pretty close to my deadline, so my progress photos were sparse.

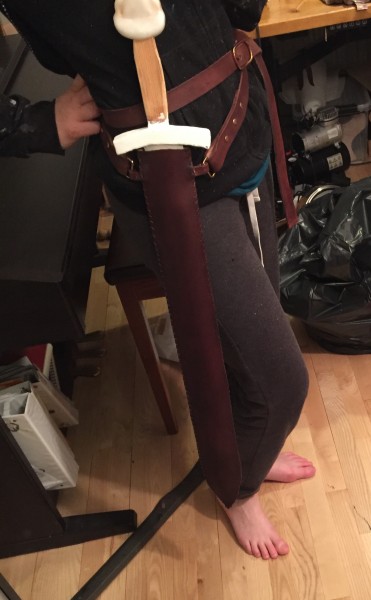
Scabbard stitched together. I added small leather straps with square rings to be used for belt attachment. I also wetted it and let it dry around the sword so that it would keep the shape even when the sword was not in the scabbard
This is where my speed is making me forget to take progress pictures. But the belt was not a big deal – a straight strap from core leagher folded around the square rings on the scabbard, then held in place with the same type of screw-on rivets used in the bracers. Belt buckle was made by cutting a straight line in the leather where the pointy bit goes and folding the leather around it.
Both belt and scabbard were painted with the same brown leather dye used for the other brown parts.
Look at that pretty outfit – this is what I wear whenever I’m crafting – which is pretty much always when I’m at home.
The last step of the scabbard was adding fur around it! This was pretty simple, as it’s just a piece of fur wrapped around and then tied in place with leather cord. I triple secured the knots on the cord to make sure it would stay in place!
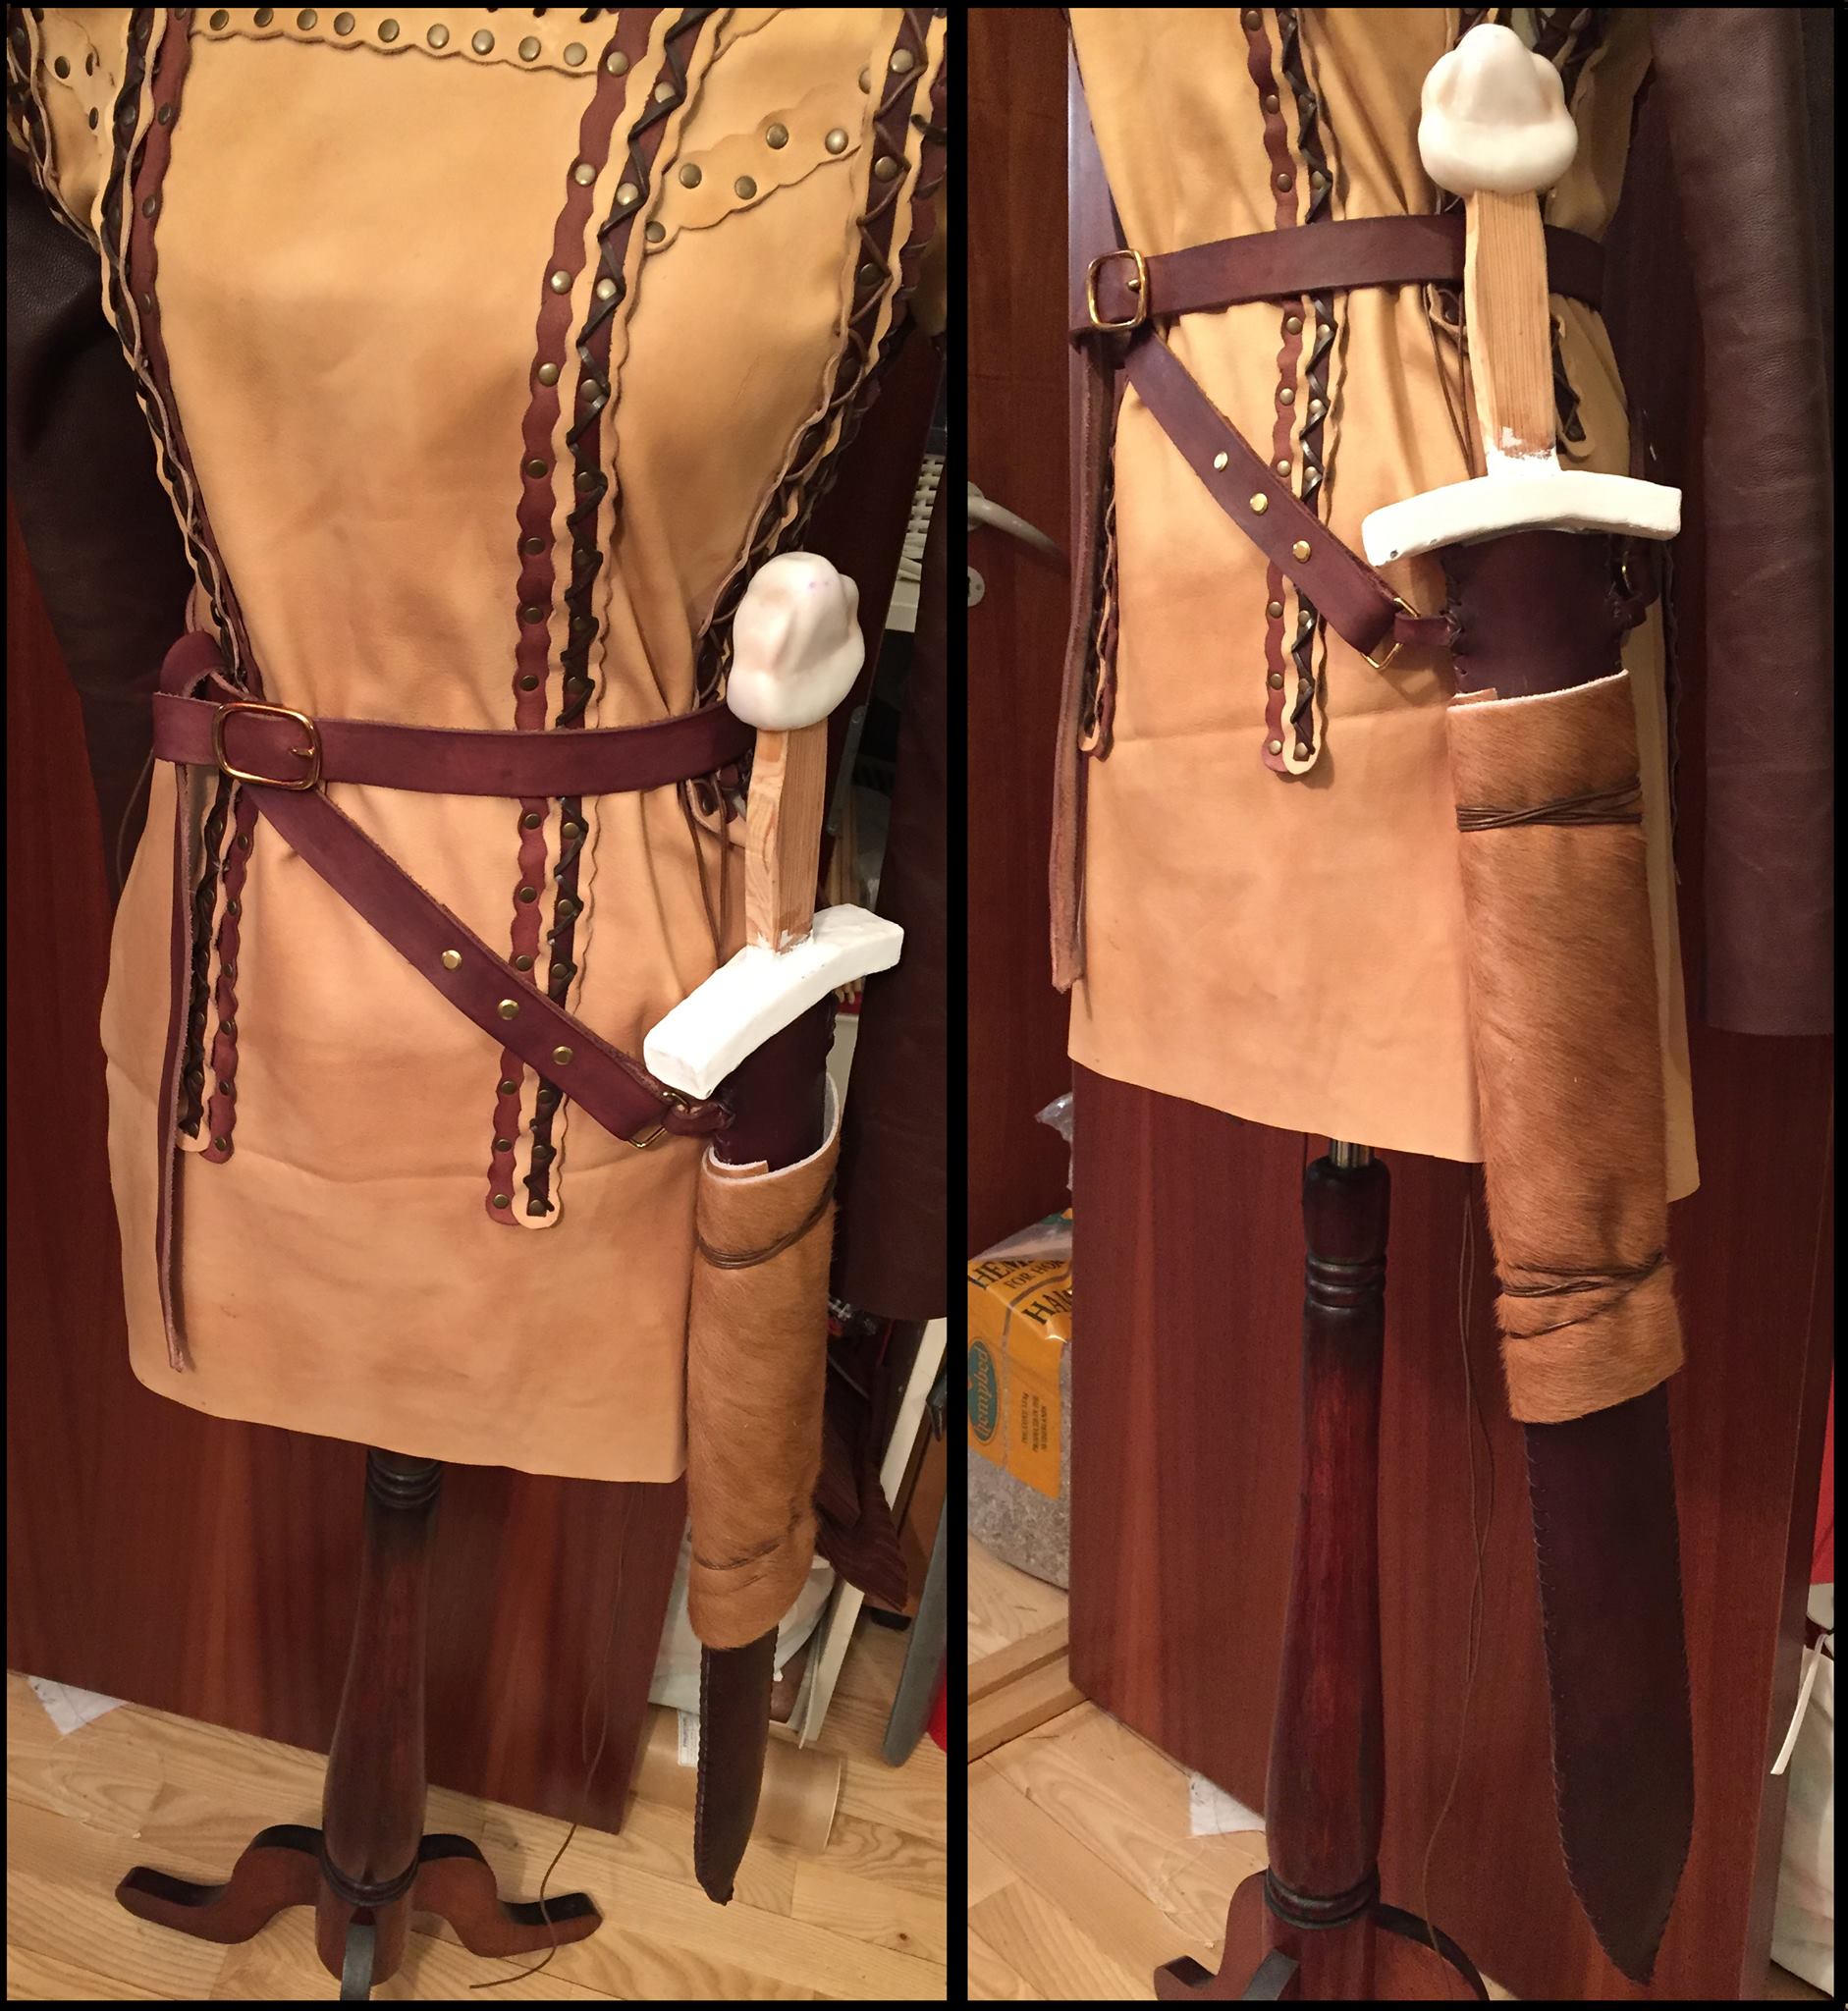
While I am against most furs in general, I feel that this costume – seeing as it’s otherwise made from real leather – required real fur. I was so lucky that I found this fur in the trash. I’m not sure of it’s origin, but I feel a lot better using it knowing that this precious animal’s fur would’ve just ended it’s days in a gross container with disgusting stuff before getting burned, had I not taken it and used it here. It may have died for it’s skin, but at least I’ll make sure it wasn’t a waste.
And thus, my costume was concluded! I had a moment of panic before wearing it for the first time, because I didn’t know what to do about hair. I first planned to use my own hair, then had loads of trouble actually doing the hair style, because my hair is so long and thick, the weight pulls it down and makes it sit pretty flat, whereas Lagertha has a big poofy thing on top of her head. I considered a wig, but knew it would look weird, unless I really invested in an expensive, quality one. In the end, I went with my own hair and I’m pretty happy with it. It’s the part that is least true to the reference, but it still looks good with the outfit. I even added little metal chains to the Dutch braids I made down the sides of my hair in front.
I have yet to get some photos, but here are a few that I did manage to get my first time wearing the costume:

A couple of hall shots – one next to the reference for comparison.

A nice photo taken by TM photo