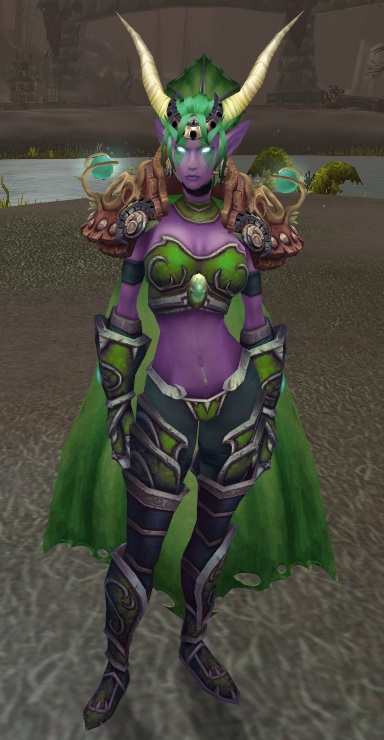
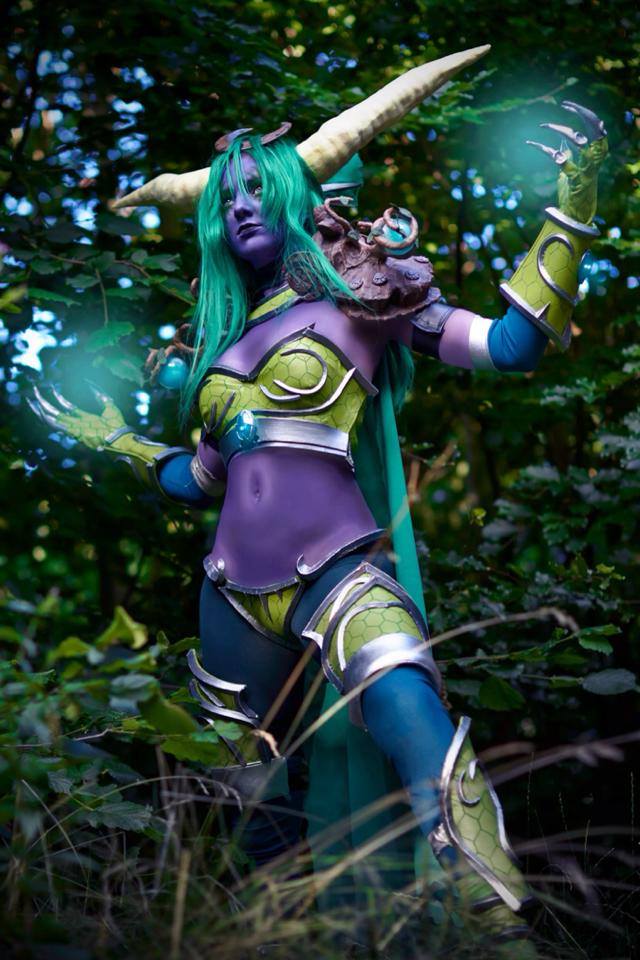
Ysera the Awakened from World of Warcraft (Cataclysm).
I chose this costume for several reasons. First of all, I saw it in-game and liked it a lot, and secondly, because I found a cosplay partner who was also interested in doing one of the dragonladies from WoW. Originally, I wanted to do Alexstrazsa, but my friend was more interested in her, and I also really like the idea of tights. My body just stays warmer when its, well, covered. How we did it: The majority of the armor parts are made from EVA foam and pleather. While working on this cosplay, my friend has also worked on her Alexstrazsa Cosplay, and we worked together often.
Since the two have almost the same model, we have used many of the same patterns and techniques. First, we made patterns for the leg armor, wrist armor and ankle armor. We made these by covering each other with cellophane wrap, then painter’s tape. We then drew on the painters tape the shape needed for the armor-part and cut it off. 
We transferred the pattern to the EVA foam.
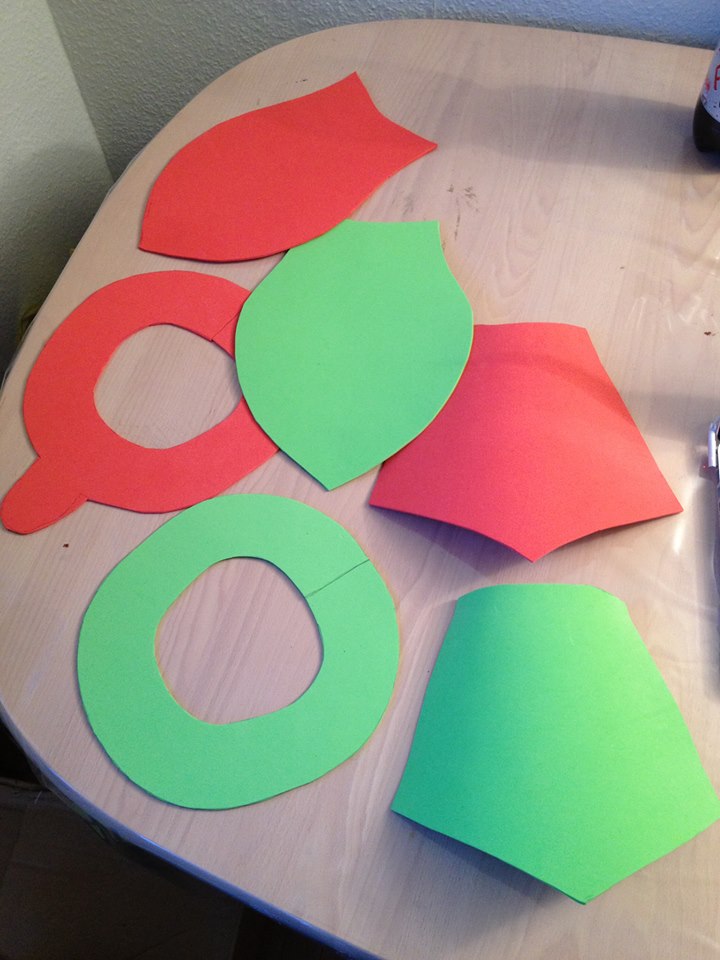
Then we put the foam on top of the pleather and cut this as well, leaving 2-3 cm seam allowance all around. Since these girls are dragon ladies, we decided to emboss the pleather with scales. We made a template, drew the pattern on the fabric and then burned it using a wood burner/soldering iron.

The pattern for the underpants was made by finding a fitting pair of underpants and cutting them apart for a base pattern. Then we cut them from foam, and sort of tried them on, adjusting as needed, until we got a good fit. The top was made on a base of a regular strapless bra. We used the same painter-tape method to get the pattern for the cups, and used fabric-wrapping to get the rest of the pattern
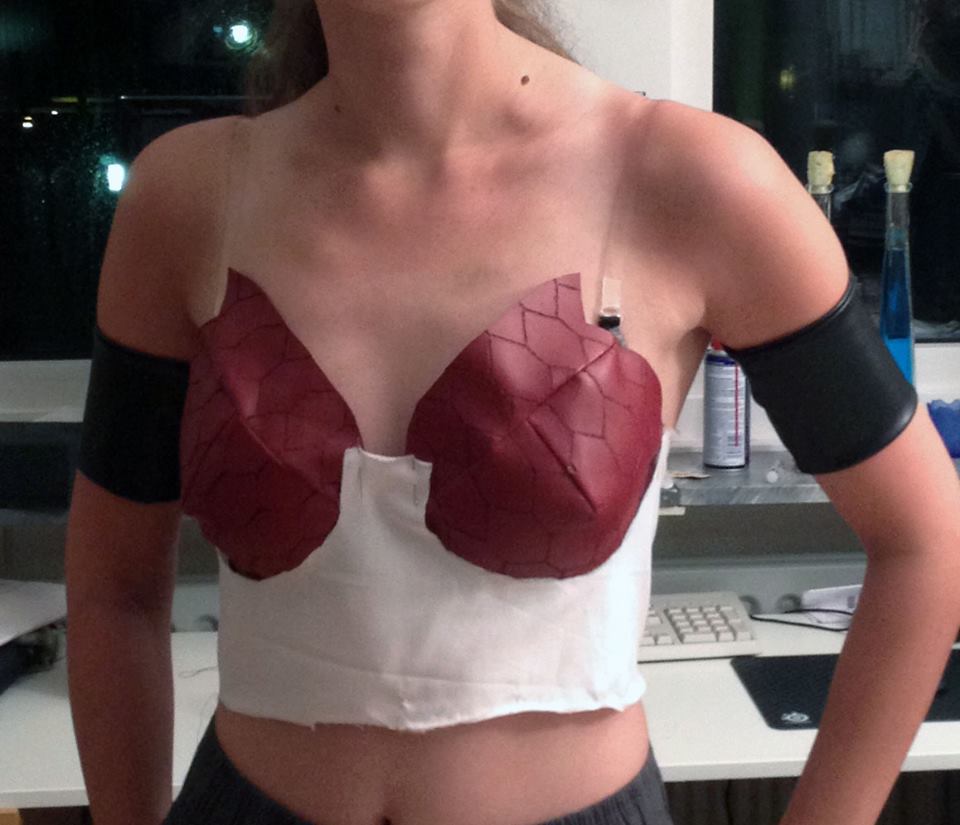
The hip armor-patterns were made by measuring around the legs the width they needed and the height, and then free-hand draw on paper and trying until we got the shape right. Once all parts were ready for assembly, we figured out how to mount them. From bottom up: Ankle armors are attached using Velcro. These armor-parts do not have any foam, as they’re very small and sit below the shin guards. The shin guards are mounted with a silver-fabric covered elastic. This is not optimal; Velcro would have worked better here as well. The hip armor has a silver border at the bottom. This is made of double fabric that wraps around a piece of foam. A gap is left on the inside of the thigh, and a piece of elastic runs all the way around the thigh to keep it in place. A buckle is placed a bit higher up which attaches with Velcro and can be adjusted to be tighter or looser. The underpants are closed at the sides with elastic, which is later covered by the silver border, which slides on top and has a Velcro close-function at the front. The bra has Velcro in the side (Ysera) and back (Alex) The wrist armor is closed with Velcro. A “pocket” for the battery and switch was sewed on the foam BEFORE the fabric was attached
. 
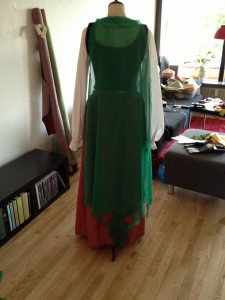
Once mounting was planned, we attached the fabric with first a bit of glue at the sides (contact glue), then sewed it. For the shoes, I used a pair of pumps with a small heal. Not too high, since I need to be able to wear them for a long time. Comfortable shoes when possible is a must! They can be seen in the picture a bit further up the page (mine were blue). I started off painting them green. It wasn’t really necessary, but in case the fabric I covered them in was transparent, I did it. I used this tutorial to make the boot covers, except I used stretchy fabrics, so I didn’t make a zipper.

All borders are made from EVA-foam. I tried using silicone, but it cracked and was too heavy. EVA foam was hard to cut in the triangular shape, so I got a template to use for it:
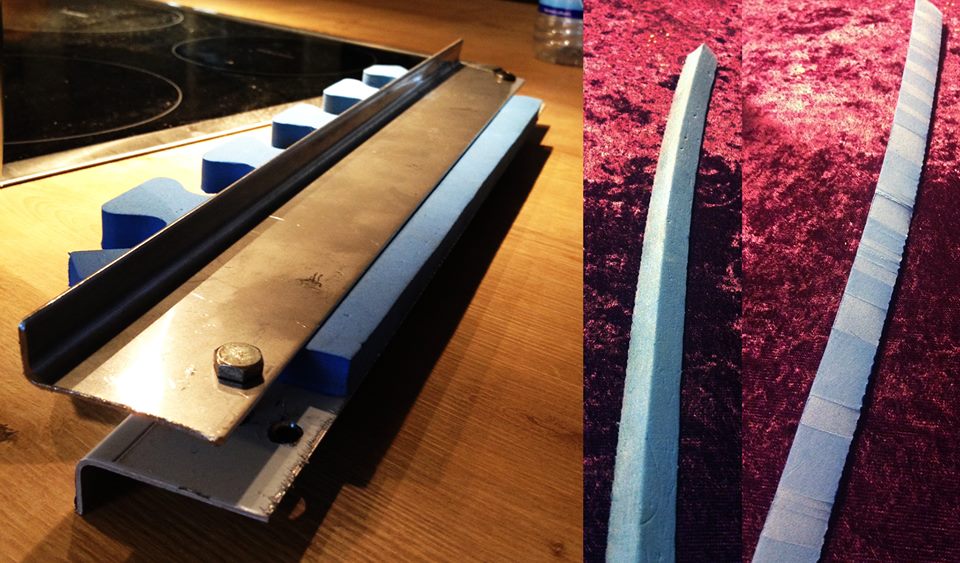
It is pretty simple – just two pieces of hard material (in this case, metal) that doesn’t get ruined by a knife, with screws that can tighten and holes that are spaced from each other the same width as the height of the foam-pieces. After cutting the pieces, I primed them with wood glue, then painted with acrylic paint. Where needed, I shaped them according to the armor-part before painting and priming, to prevent paint-cracking later.
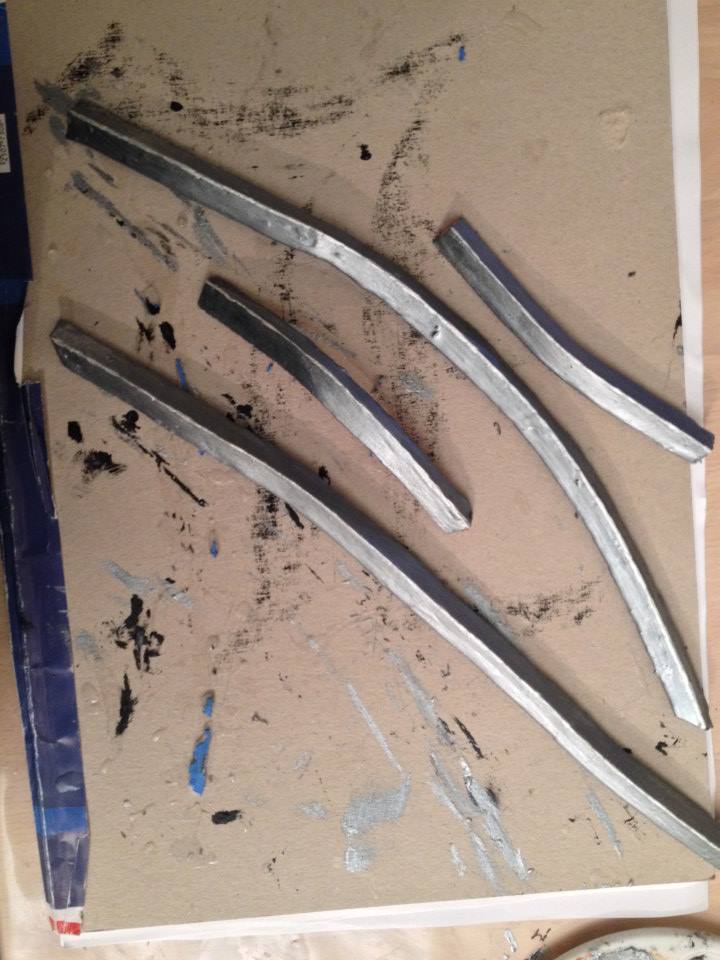
The borders are attached to their armor parts with contact glue
. 
The details inside the parts are made by cutting the regular borders in half, making them half the thickness and height of the borders. This seem appropriate for details. Otherwise, they are made the same way with wood glue and paint

The underpants has a rounded shape at the front, this I cut without a template and sanded afterwards to make it smooth. Then I glued it together with the border around and primed+ painted this as well. At the sides, I made little loops from leather and sewed onto the foam, so the elastic could slide inside and not show when the panties are worn, yet still make it possible to get them on and off.

The wrist armor has glowing gems, these were made with clear casting resin using half a plastic-easter egg as mold. After the resin had hardened, gems were painted with nail polish. I used rubber to cover the border of the gems (though, it might have been better to use worbla here):

The necklace is also made from foam with a Velcro closing at the back. Originally, it had a fabric border (see below), but I later changed this to a foam-border while making the necklace a little smaller (in width) and with a bigger hole for my neck. The cloak is attached with buttons to the necklace and is detachable. The cloak itself was made from a thin fabric, and the edges were made by melting the rough borders with a candle and adding watered down acrylic paint to the edges to get the worn, burnt effect.

I was unable to find gloves in the right colour, so I sewed them using this pattern. I sewed the same blueish green fabric as on my shoes above the wrist until the elbow, where I used silver fabric and elastic to keep the gloves in place.

The horns were made by using a couple of cans of PU foam and just spray on a newspaper and let that grow/dry. Once dry, we cut it out until we had the right shapes. These, we covered with paperclay.
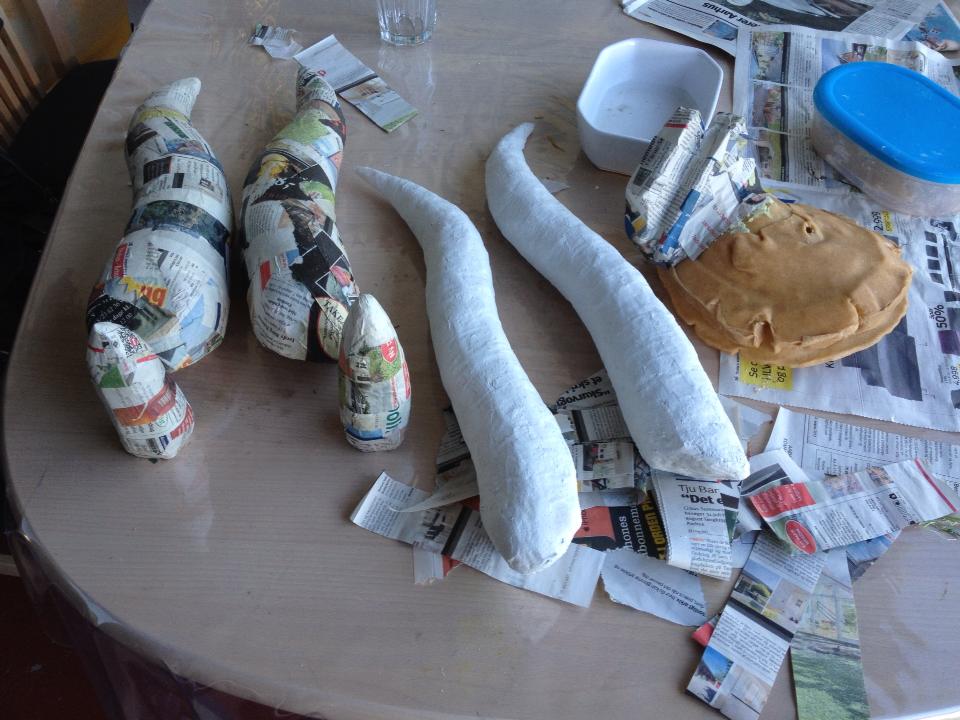
After sanding, they were painted:

After getting this far, however, I decided that I wasn’t satisfied with them. They were too big and clumsy to sit nicely on my head. Instead, I used them as a cast form to make new ones from a material called Kobracast (Info about it can be found here.)
I made the new horns by heating up the Kobracast with my hot air gun (it’s a thermoplastic material) and wrapping it around the horns. When it was dry, I cut off the horns and put them together at the cut. Then I cast the bottom of them again and this part I mounted on the wig by making a hairband of Kobracast that sits on the inside of the wig and place the two “plugs” on the outside, attaching the inside hairband to the outside plugs with sticks of worbla. The horns then fit onto the plugs. More info about this in my “Big horn tutorial“.
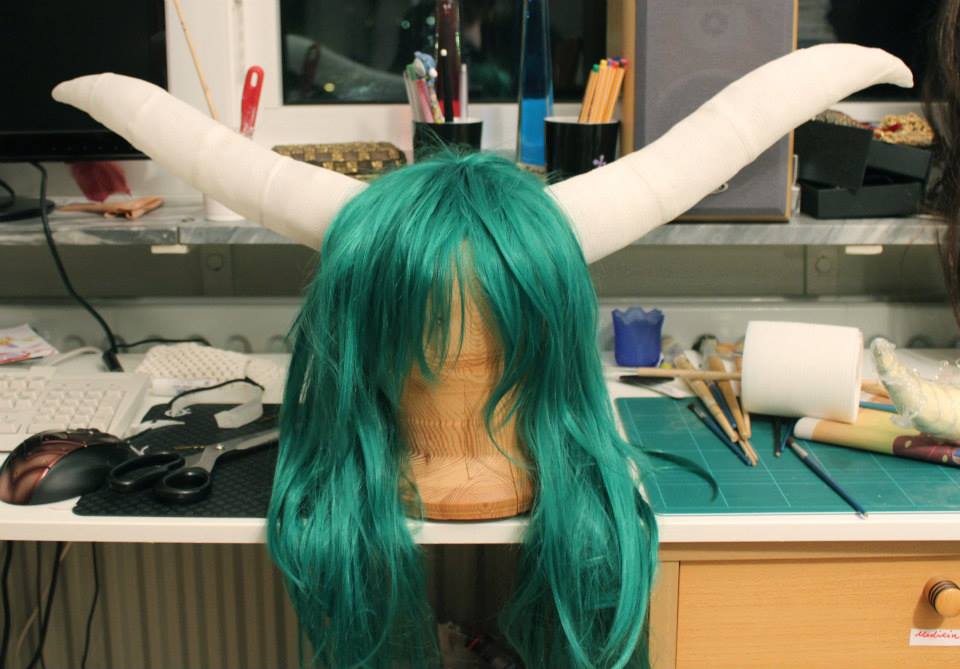
The placement of the horns was corrected a bit later.
The hair decoration in Ysera’s ponytail was made using the same fabric as the cloak and sandwiching it between two layers of foam, painted silver. An elastic hairband was attached to make it sit tight in the hair
: 
However, the wig doesn’t cover my own hair when it is in a ponytail, so I decided to change the hairstyle to have lose-hanging hair and a pony-tail on top. I accomplished this by using a second wig to make a clip, and also to generally make the wig thicker, as my own hair stretches it enough to show spaces between the rows of hair.
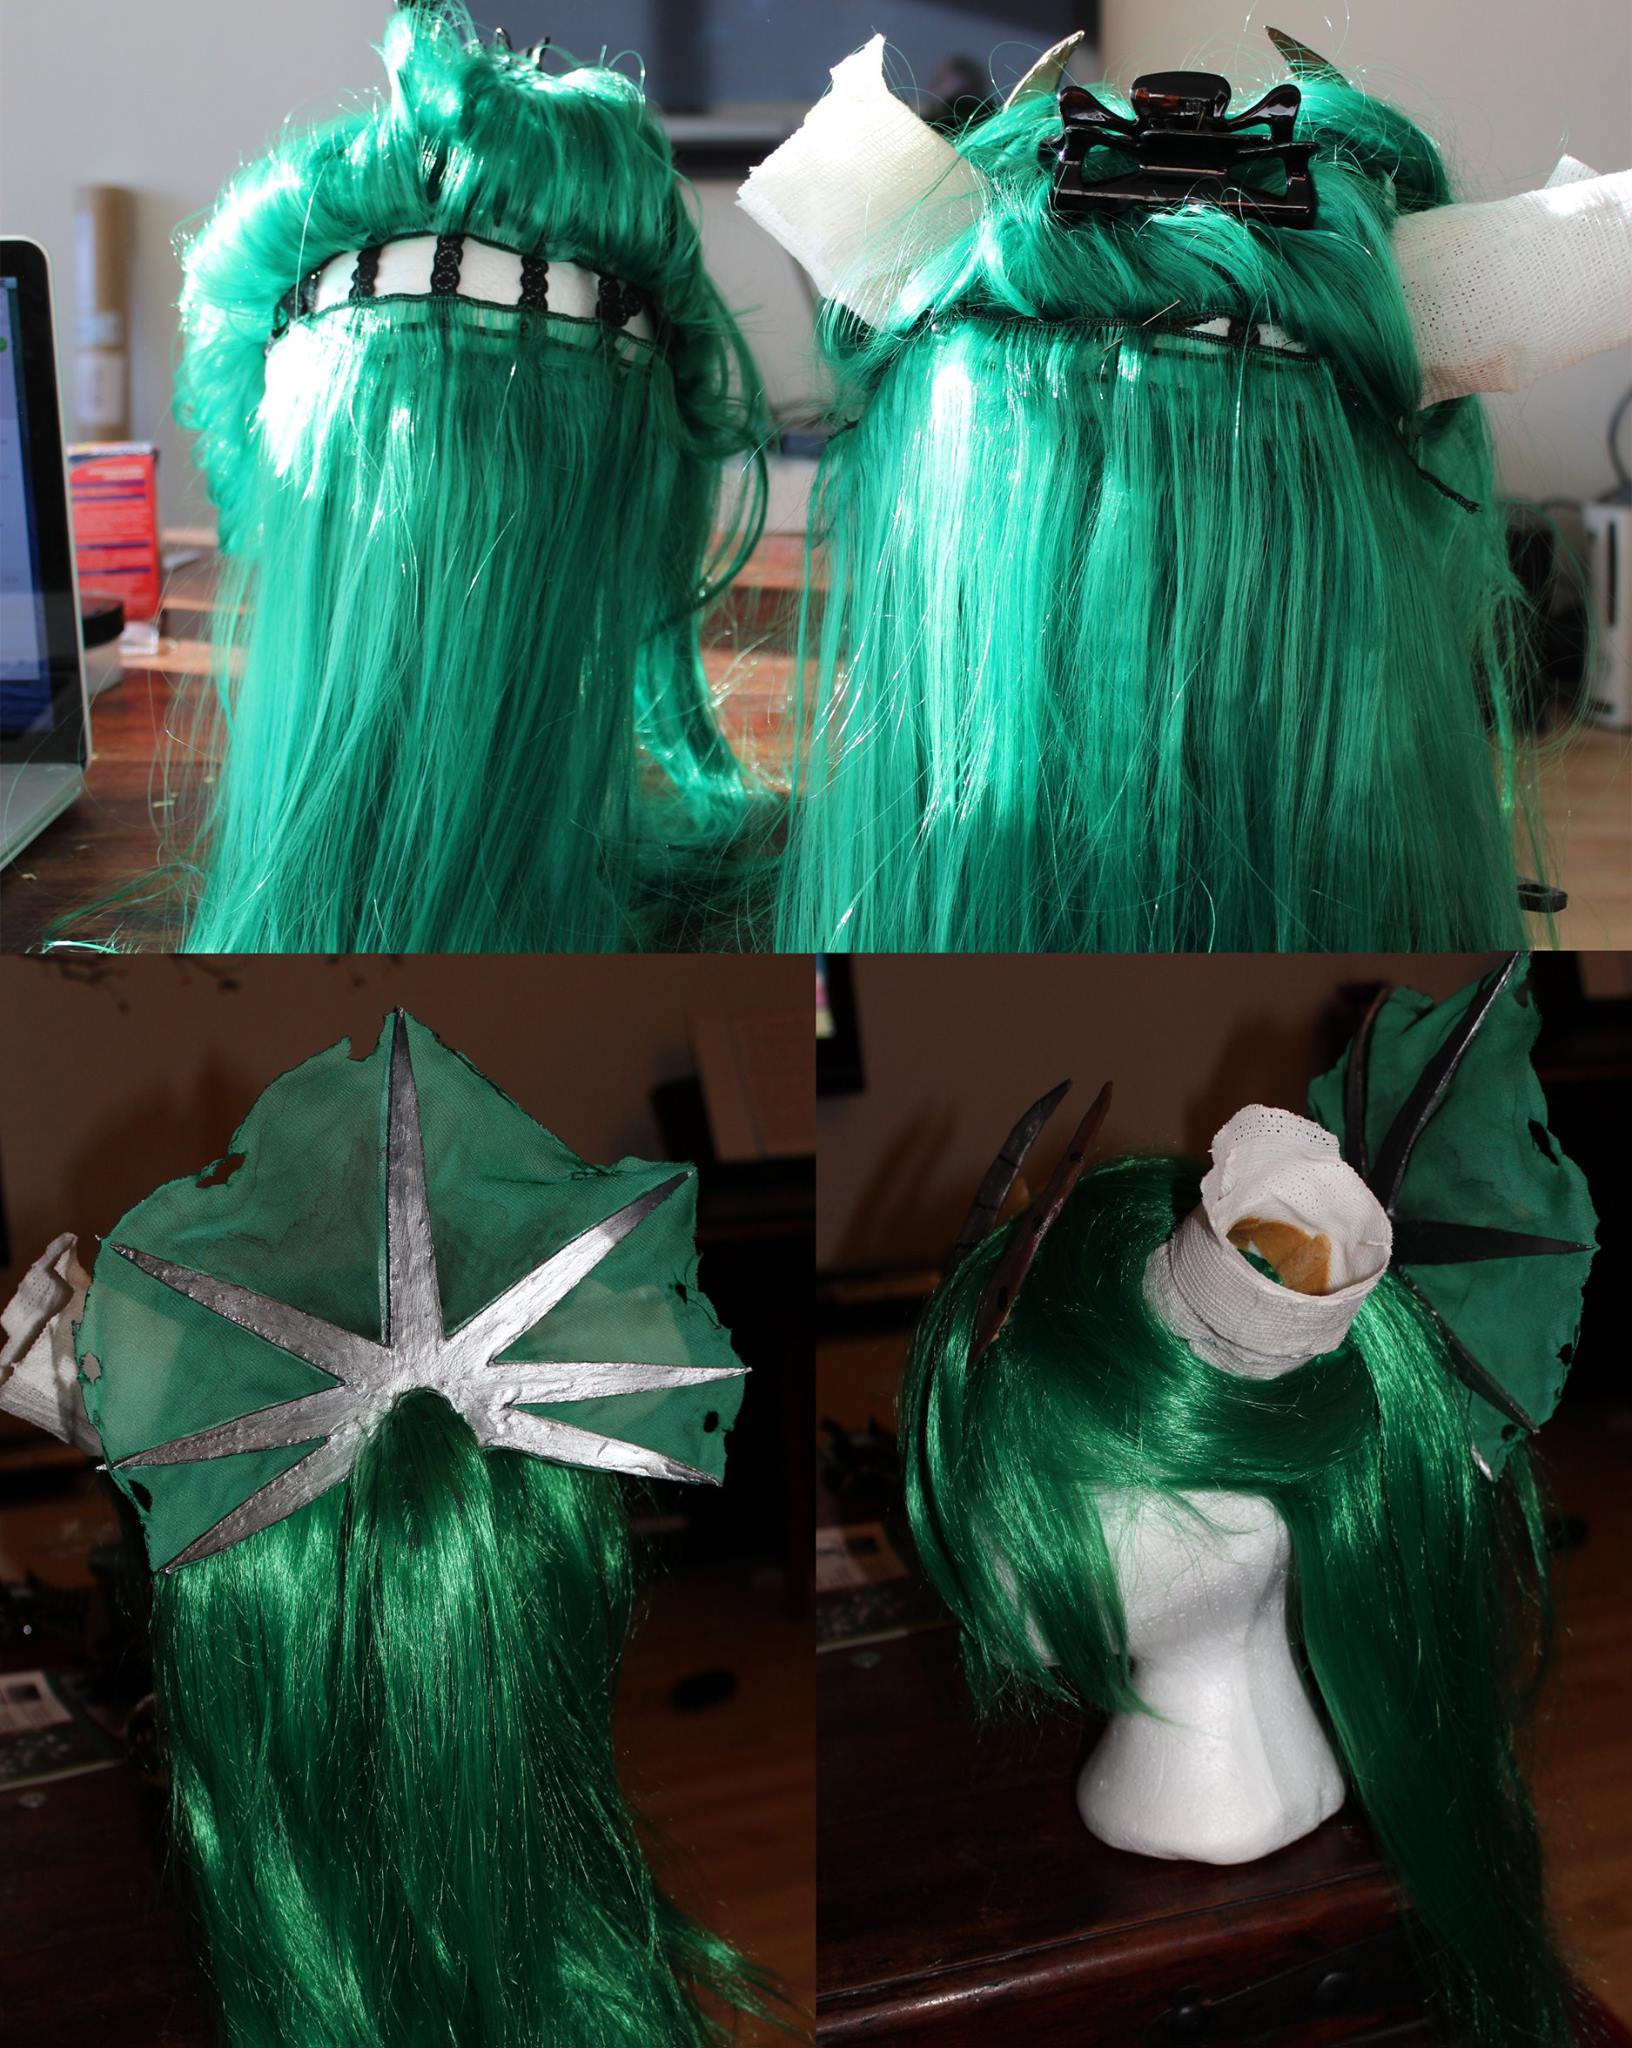
The crescent moon on the forehead was made with paperclay on a cardboard base, which I then covered in worbla. It’s attached to the same headband as the horns under the wig.
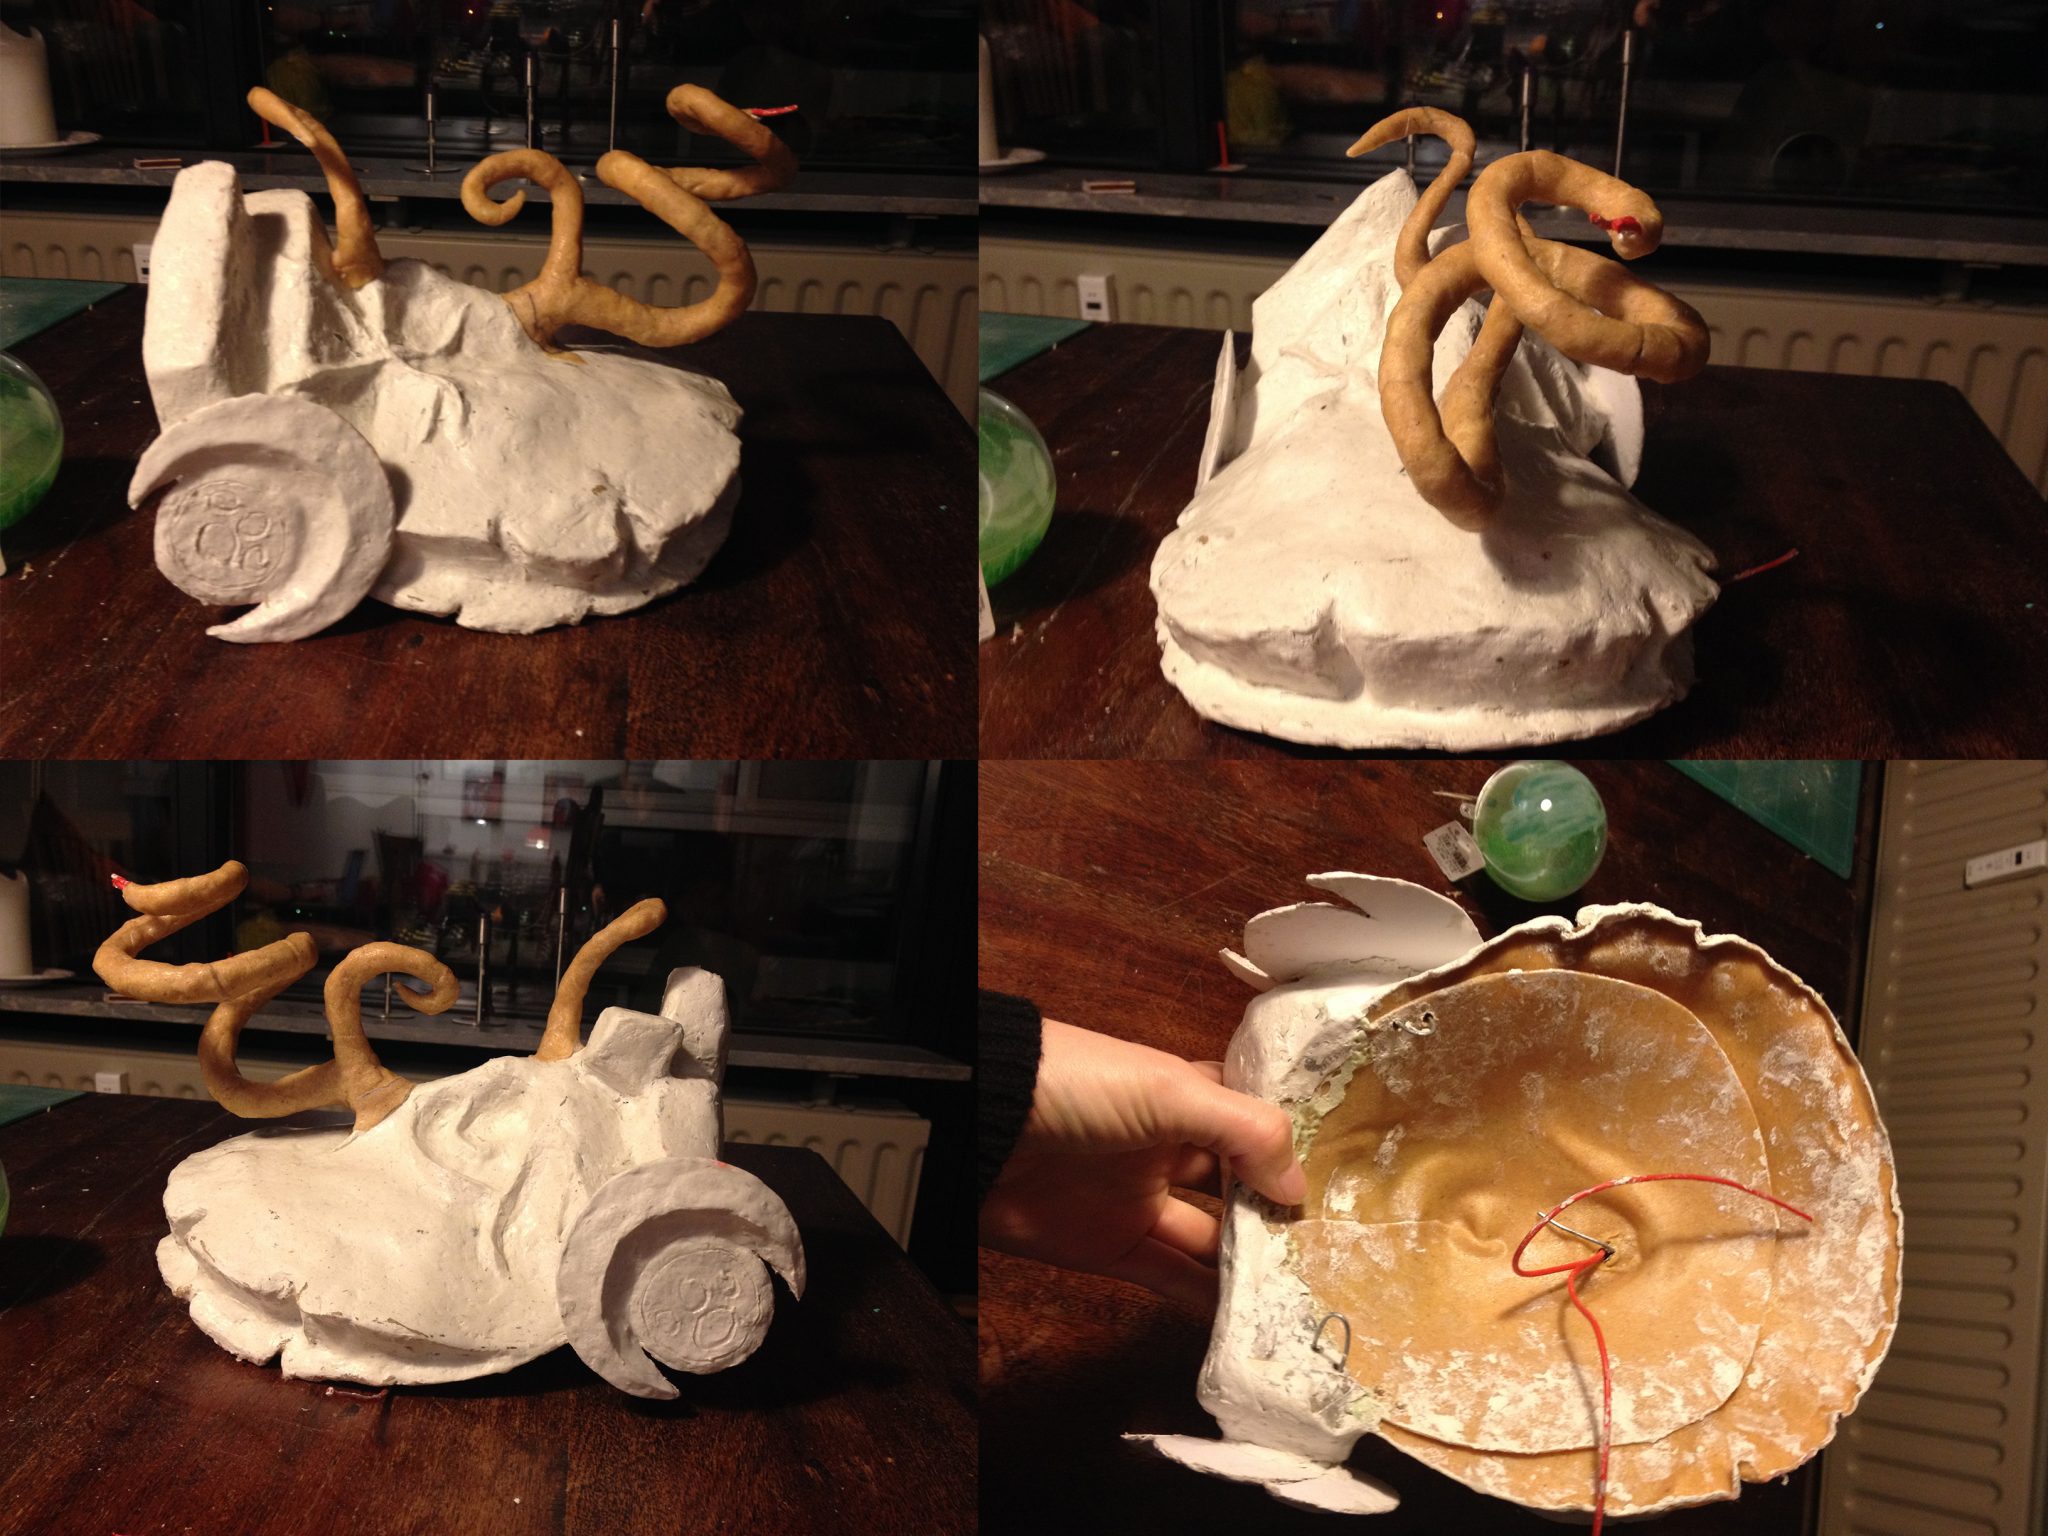
Unfortunately, I’ve lost most progress pictures of my pauldrons. They’re made from worbla with some thick foam in-between to give the thickness. First is a layer of worbla that fits on my shoulders. Then a layer of foam, covered in another layer of worbla. I used expanding foam to create the thicker parts closest to the neck. The branches are made from metal wire with alu foil around. I added cable for the orbs before the alu foil. I drilled two holes in each side and added thick metal wire to them (for mounting later). I covered all with paperclay, then decided that the branches weren’t stable enough, so I covered them with worbla. 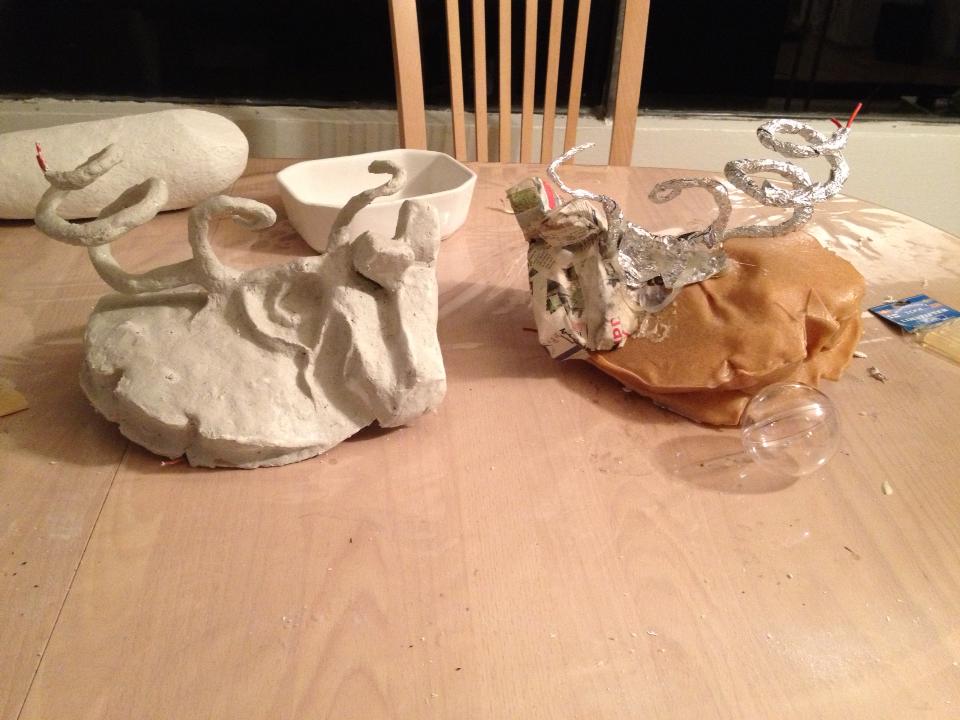
I made the paw-in-halfmoons from cardboard covered with paper clay and nailed them to the pauldrons
. 
I covered everything with several layers of wood glue, before I started painting the pauldrons.
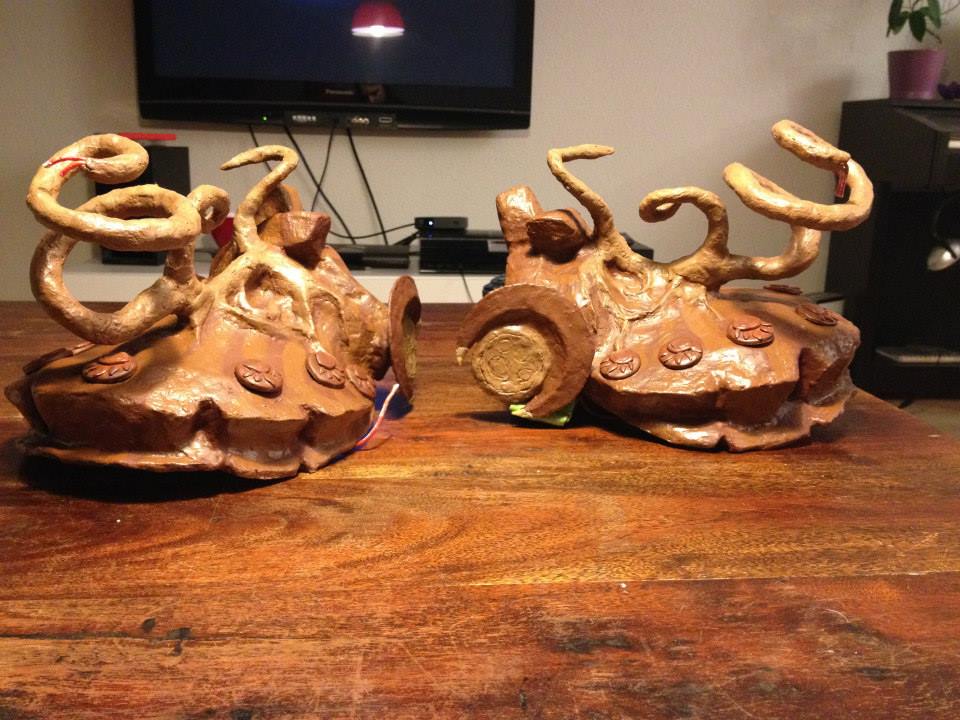
First, I put a basic layer of paint with only 3 colours. I then layered and layered shadows and highlights, probably adding 6-7 layers of paint in total until done.


Finally, I only needed to add orbs. The orbs are made of plastic, transparent christmas decorations that I have drilled a hole in one end to allow the LED
The decorations were coloured using a combination og nail polish and acetone on the inside of the decoration. This gave the plastic a green colour (nail polish), while at the same time staining the plastic to give it a frosty, non-transparent look. After placing the orbs (they are made to fit tightly into the branches, and do not need glueing or anything), I soldered the circuitry, and the result:

The pauldrons are mounted like this:

The finished result with body paint and all:
Cosplay: Skymone Cosplay
Photographer: Kristian Lund